Appearance
System Center (SCCM) Integration
Microsoft System Center Configuration Manager (SCCM) enables deployment of Turbo applications across enterprise environments. This guide covers several deployment methods using SCCM.
What you'll learn
- How to distribute standalone executables
- How to deploy using MSI packages
- How to configure file share deployment
- How to prepare SCCM application packages
- How to manage application updates
Prerequisites
Before proceeding with this guide, ensure you have:
- Turbo Hub Server: Set up a Turbo Hub Server. For optimal performance, it should be in the same region as your SCCM-managed devices.
- Turbo Client Installer: The installer for Turbo Client. You can download it from https://turbo.net/download.
- SCCM Environment: A functioning System Center Configuration Manager environment.
Deployment Options
Standalone Executables
Deploy applications using standalone executable files that include the virtual machine. Applications can run directly from local storage or network shares without installation. See building standalone executables for details.
MSI Packages
Use Turbo MSIs to control shortcut creation and file associations during deployment. See building MSIs for details.
Application Images (SVM Files)
Deploy applications using SVM files hosted on Hub or file shares. This method offers the most flexibility but requires additional configuration.
File Share Deployment
1. Configure File Share Server
Install the Turbo Client:
turbo-client-19.9.2054.0.exe --silent --all-usersShare the repository folder:
- Share
C:\ProgramData\Turbo\Containers\repo - Grant read access to application users
- Share
Download base images:
turbo pull --all-users xvm
turbo pull --all-users clean
2. Prepare Turbo Client Package
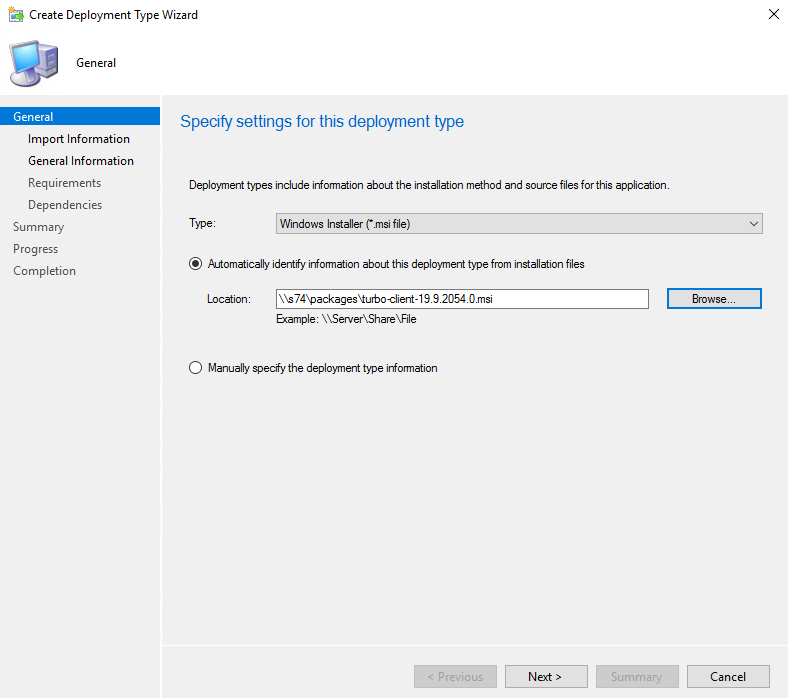
Download the MSI installer from https://turbo.net/download
Create an SCCM Application with MSI deployment type:
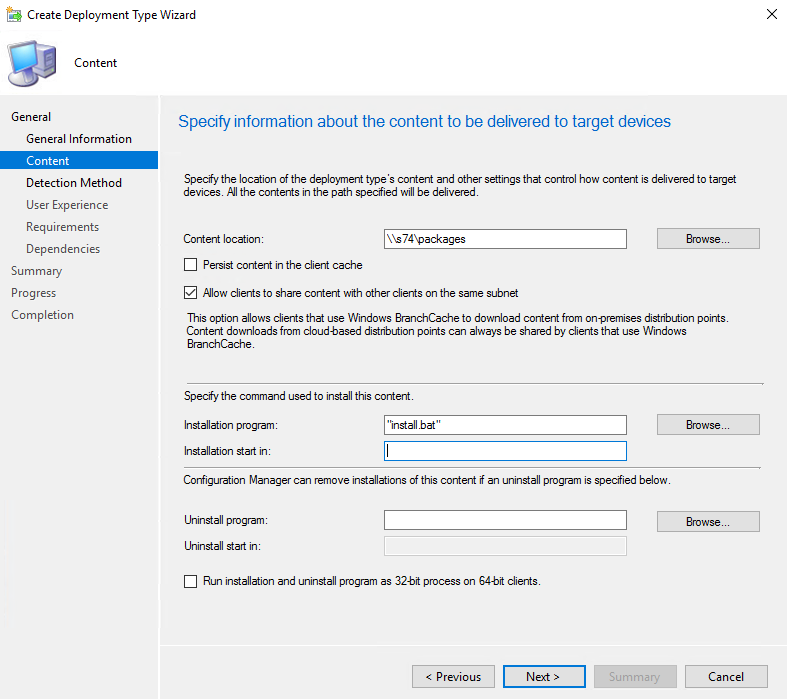
Create a configuration script (install.bat):
batch"C:\Program Files (x86)\Turbo\Cmd\turbo.exe" config --all-users --image-path {file-share} echo ok > "C:\Program Files (x86)\Turbo\configured.txt"Note
For multi-site SCCM environments, consider using separate file shares per site. Distribution Points are ideal locations. Use SCCM WMI queries to discover the nearest share.
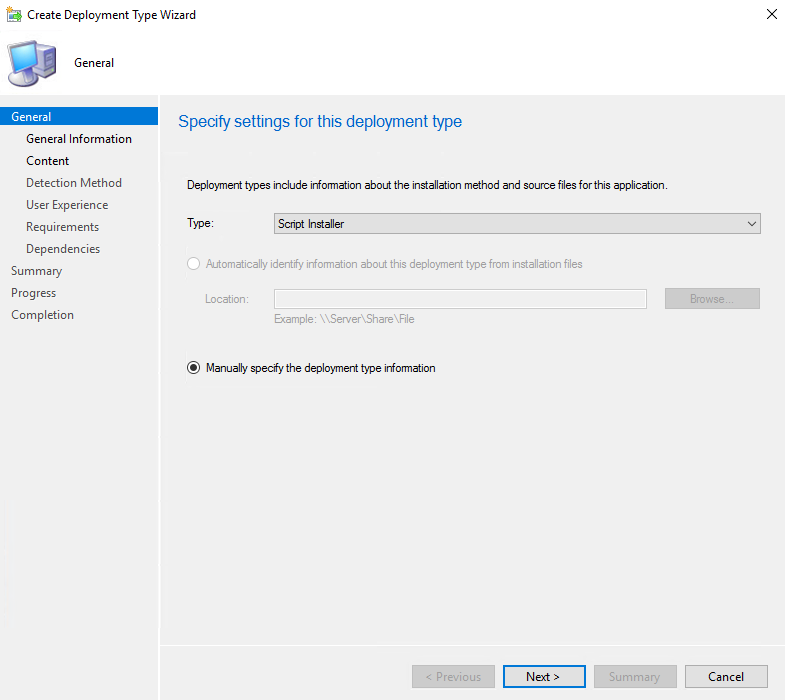
Create custom Application:

Add Script Installer deployment type:
Specify script path:
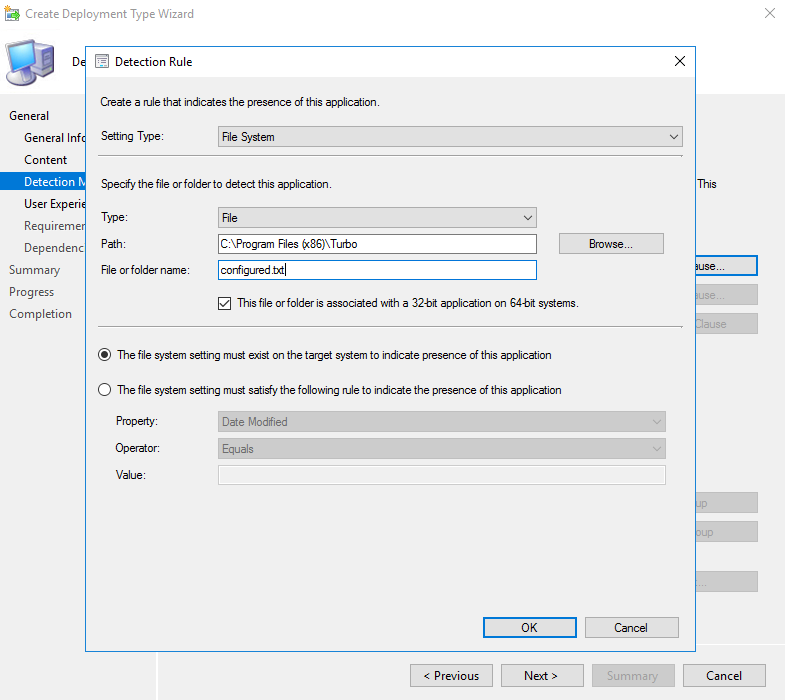
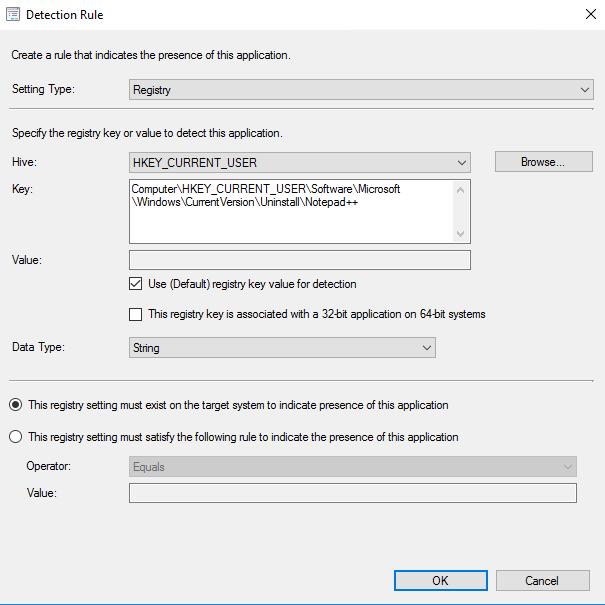
Configure detection rules:
Set User Experience to system installation
3. Prepare Application Image
- Create SVM file using Studio or TurboScript
- Import to file share server:
turbo import svm --name {app-name} {path-to-svm-file}
4. Create SCCM Application Package
Create installation script:
batch"C:\Program Files (x86)\Turbo\Cmd\turbo.exe" installi --skip-installed --offline {app-name}Create Script Installer deployment:

Configure detection rules using Uninstaller registry keys:
Set User Experience to "Install for user"
Deploy to Distribution Points and clients
Hub Deployment
When using Turbo Hub instead of file shares, you can install organization images using the subscribe command:
batch
# Add shortcuts for turbo-user account applications
turbo subscribe turbo-user

# Add shortcuts for turbo-org applications
turbo subscribe turbo-org
See installi, install, and subscribe for additional options.