Appearance
Domain
The Domain section is used to view information and configure settings for the Turbo Server environment.
Dashboard
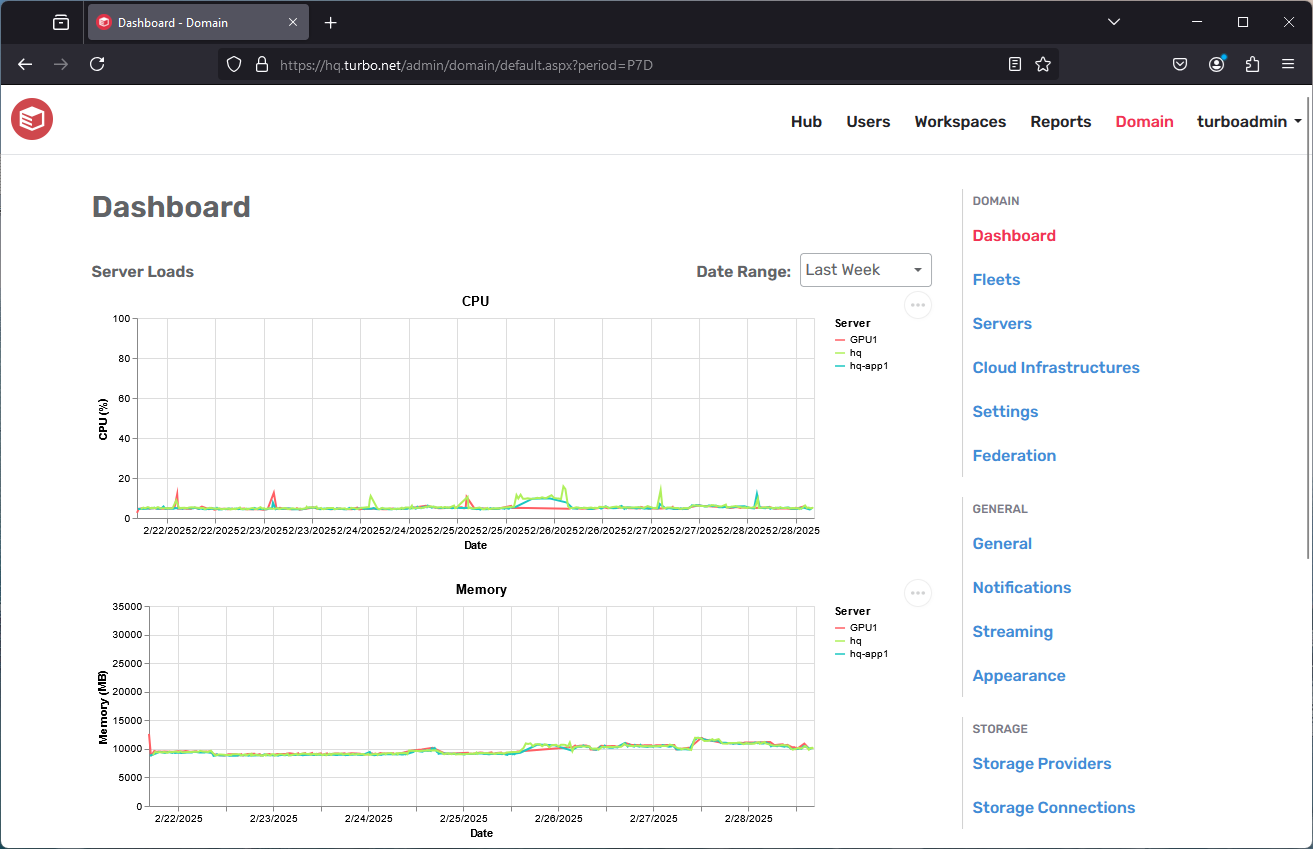
The Dashboard page shows real-time graphs detailing the total CPU, memory, number of sessions, and other resource usage information for the application servers.
Fleets
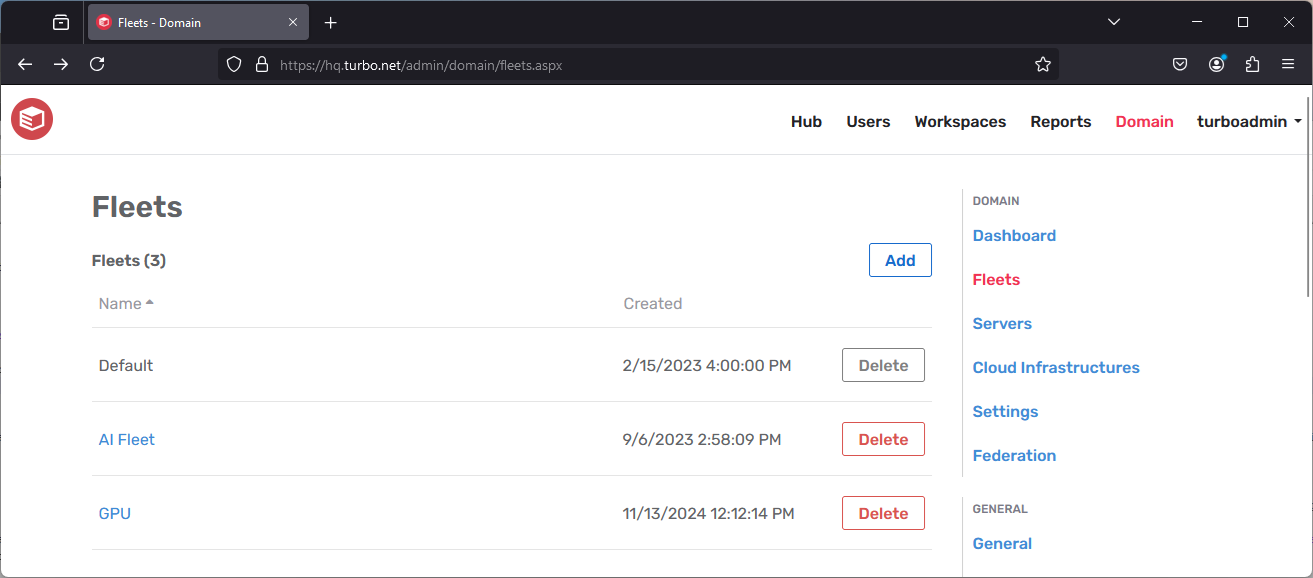
The Fleets page displays a list of all the fleets in the domain. A fleet is a group of application servers. Fleets can be deleted, but not modified.
The default fleet comprises all Application Servers in the domain and cannot be deleted. Clicking a fleet will navigate to the fleet dashboard page.
Add Fleet
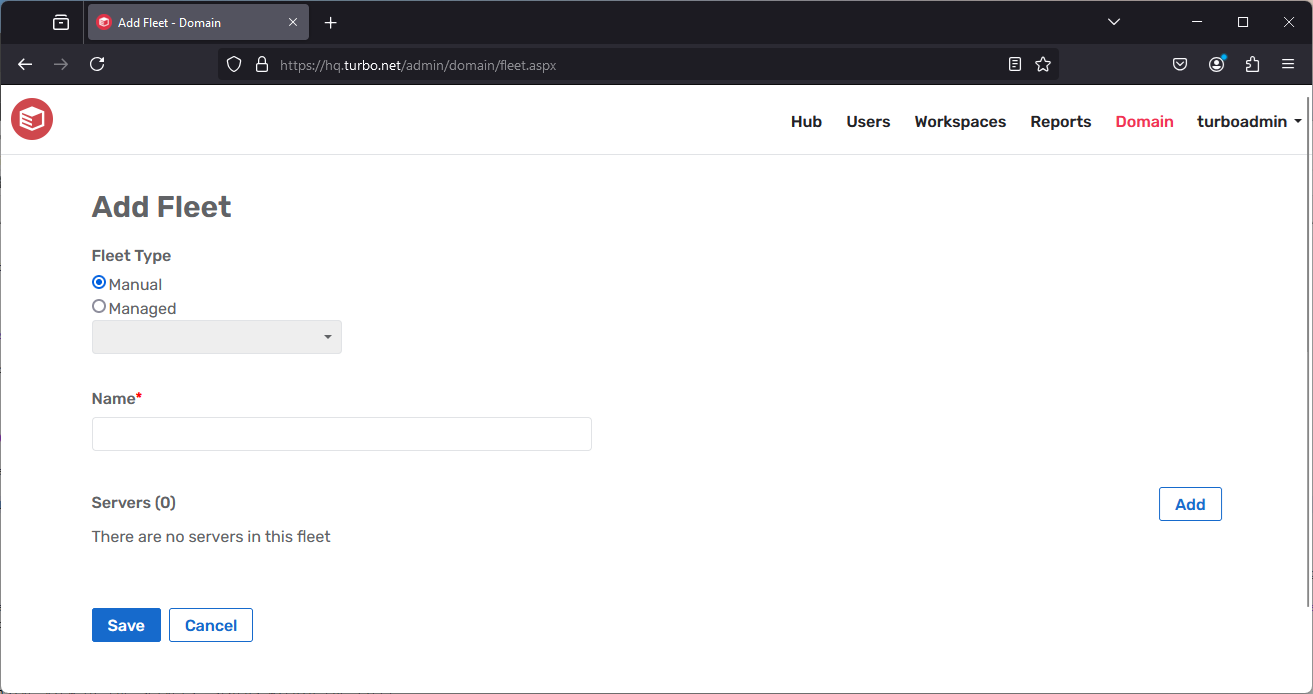
The Add Fleet page allows administrators to add additional fleets to the current Turbo Server farm. Applications can be assigned to launch on a specific fleets.
- Fleet Type: Manual or Managed. Selecting "Manual" allows the addition of any application server in the domain. Choosing "Managed" will include all servers in a Cloud Infrastructure to the fleet.
- Name: A unique name must be given for the fleet.
Fleet Dashboard
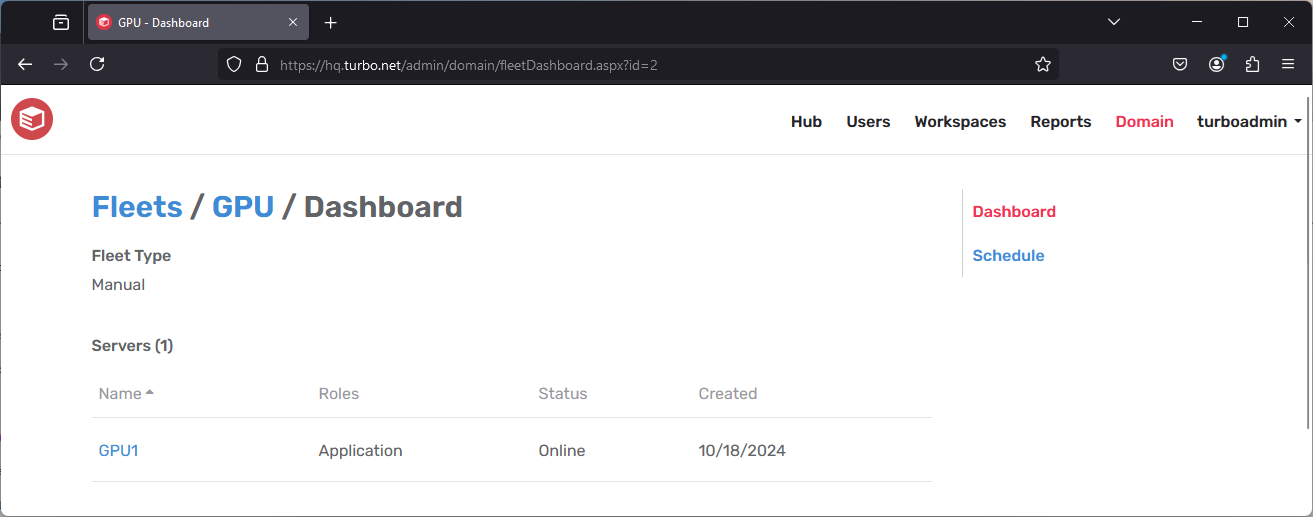
This page provides a comprehensive view of the servers' status within the fleet.
For cloud infrastructures that are supported, it is possible to turn servers on or off from the fleet dashboard page.
Fleet Schedule
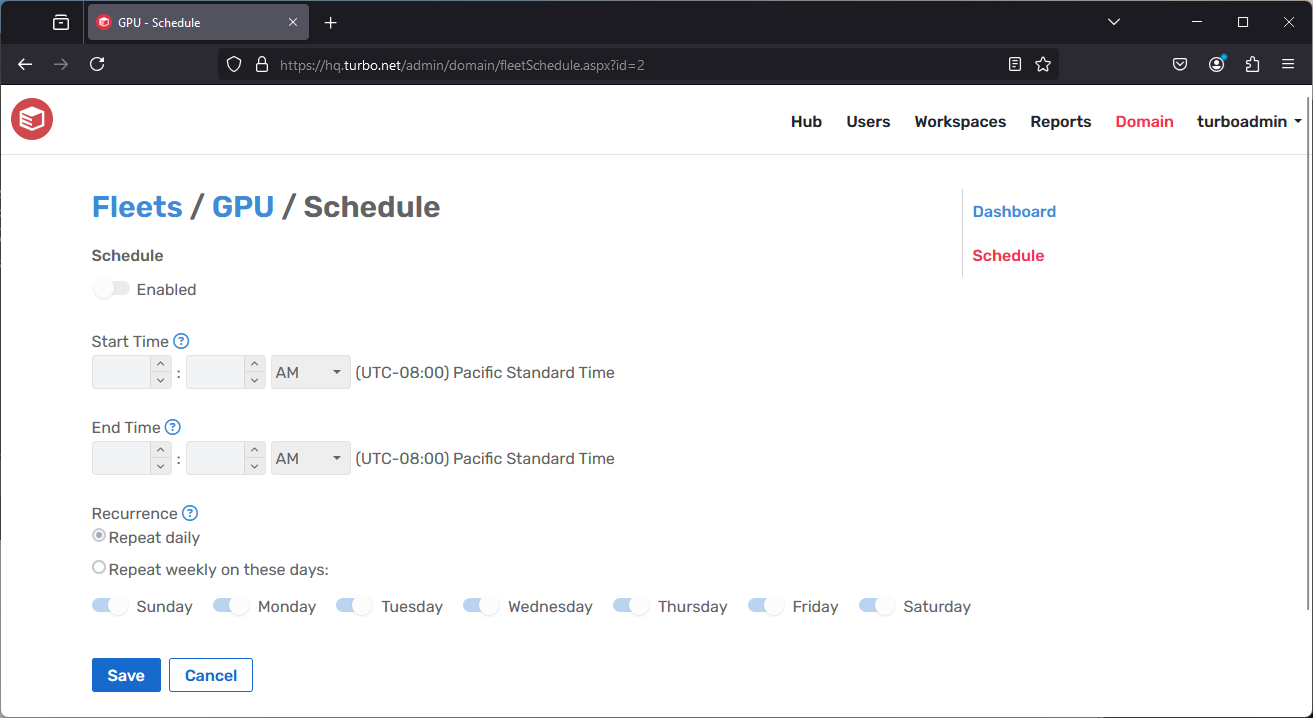 The Fleet Schedule page enables administrators to establish a schedule for turning on and off the fleet computers (excluding the Hub server). This feature is only available for compute infrastructures.
- Start Time: Specifies when fleet servers will power on.
- End Time: Specifies when fleet servers will power off.
- Recurrence: The frequency at which the schedule will reoccur.
Servers
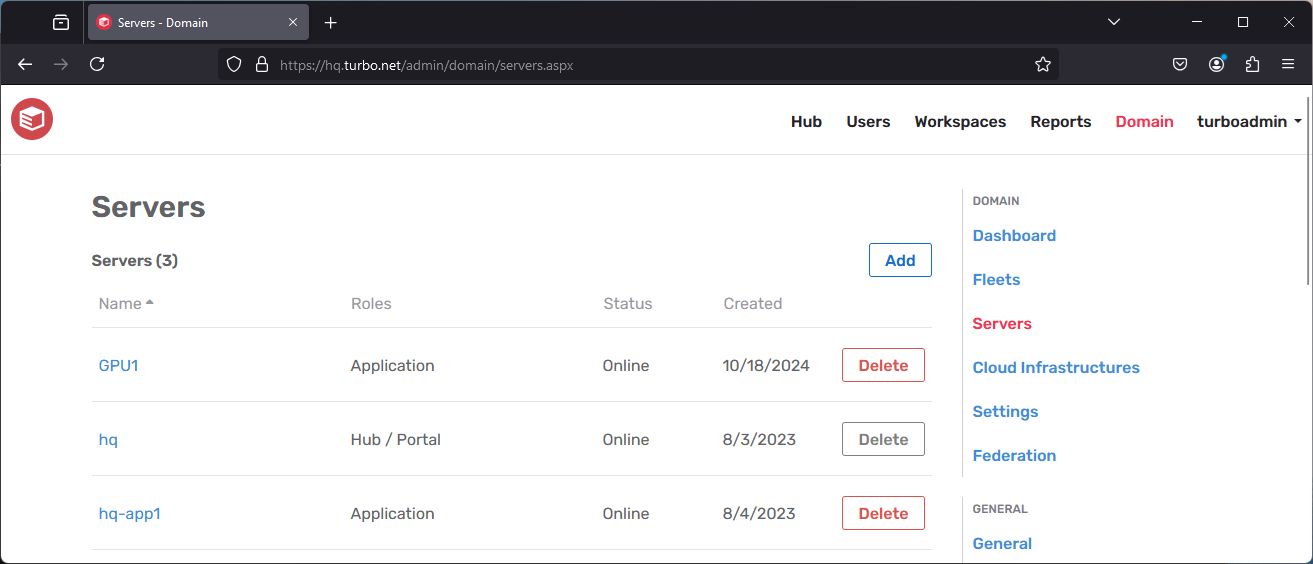
The Server page lists all servers that are included as part of the current Turbo Server installation, along with their current status. Clicking a server name will navigate to the server configuration page.
Add Server
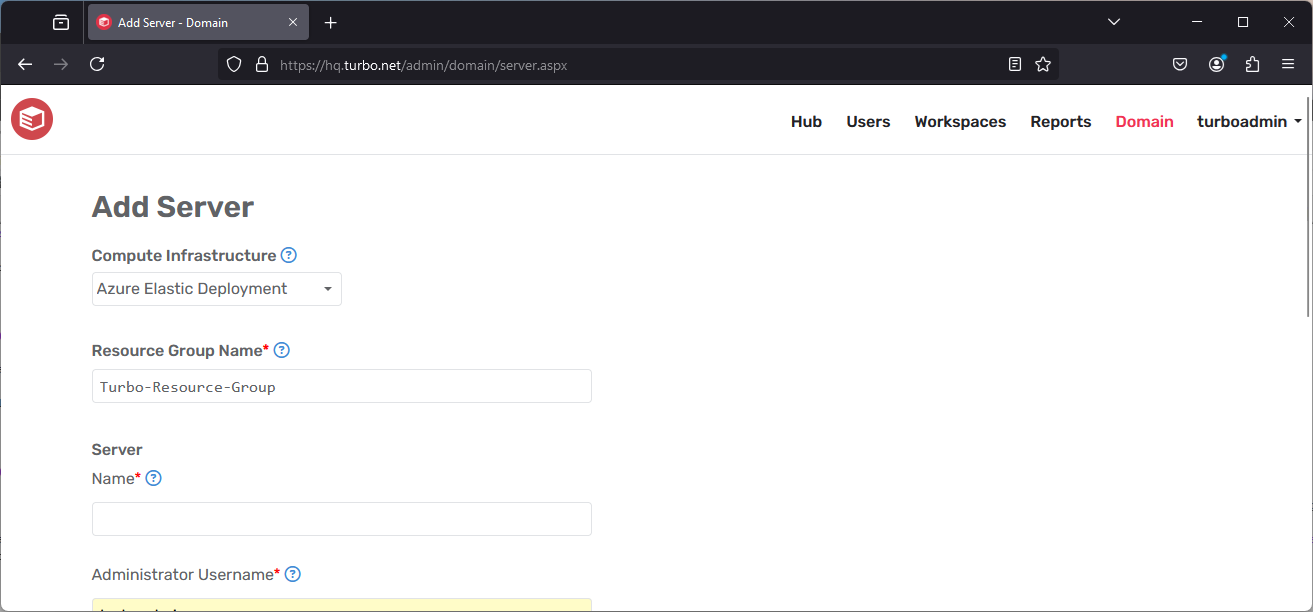
The Add Server page allows administrators to add additional application servers to the current Turbo Server farm.
Prerequisites
The Add Server feature allows you to deploy application servers to Azure environments. However, please note that it currently only supports Azure environments unless you have set up an external SQL connection.
If you have not set up an external SQL connection, you must ensure that the Turbo Server farm is running in Azure and connected to an Azure SQL Database.
In order to add a server you must first setup a Cloud Infrastructure and follow the Azure Setup Guide. This feature is only available in Turbo Server 23.1 and above.
Deploying an Application Server
To deploy an application server, complete the Add Server form with the following values:
- Cloud Infrastructure: Select the cloud infrastructure configured in the Cloud Infrastructure section
- Resource Group Name: Leave as default to use the same resource group that is configured in the cloud infrastructure setting, or enter a new resource group name. A new resource group will be created if the specified resource group is not found.
- Server Name: Enter any descriptive name for the application server (ex
turbo-app1) - Administrator Username: Enter any desired administrator username that conforms to the cloud infrastructure's username requirements
- Administrator Password: Enter any desired administrator password that conforms to the cloud infrastructure's password policies
- Confirm Password: Re-enter the password from above
- Public IP Address: It is recommended to disable the Public IP address in production environments
Once you have completed the form, click Add to deploy the application server. After a short delay a new tab will open to the Azure deployment status page. The deployment will take several minutes, you may view the current status as well as any deployment errors on the Azure deployment status page.
Once the deployment is complete the application server will automatically be added to the Domain server list and start accepting application loads.
Managing a Server
Server Dashboard
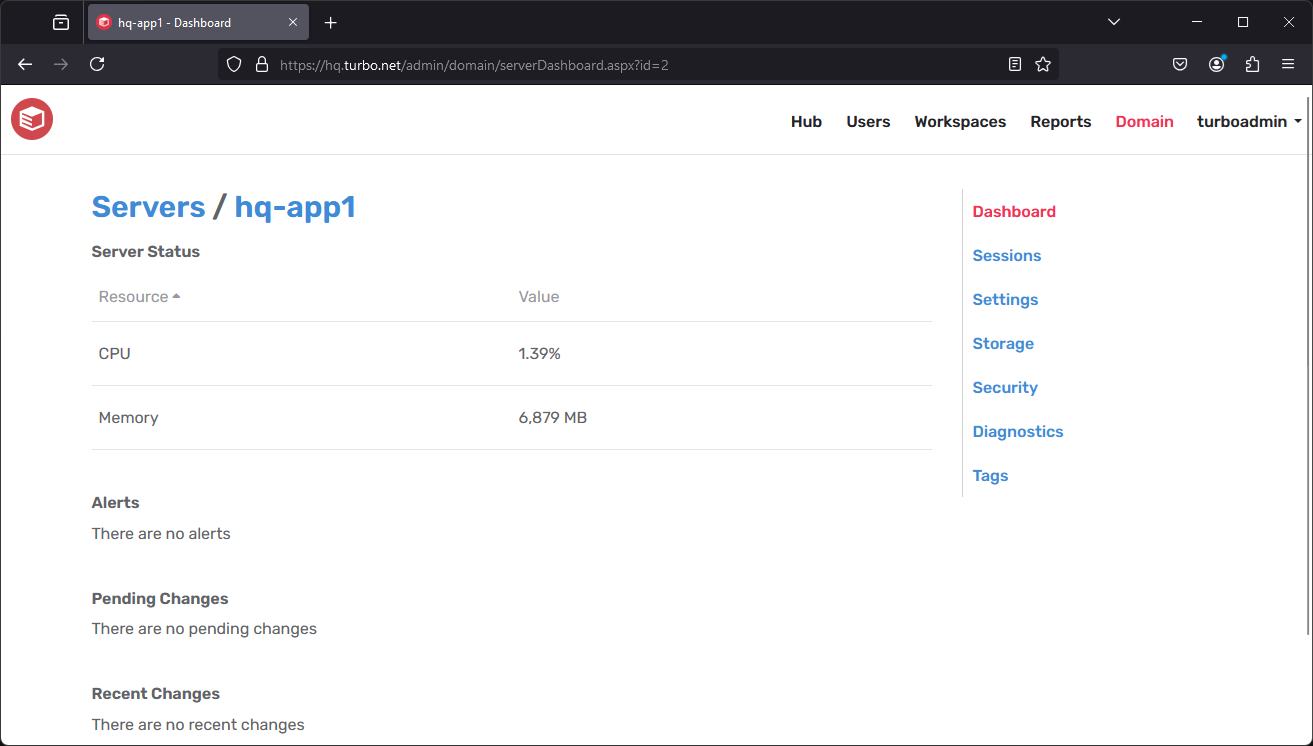
The Server Dashboard page displays a summary of the server load, alerts, and setting updates.
The Alerts table lists important status alerts such as server health warnings. Servers with Fatal alerts may fail to perform their given role or may cease operation completely. To resolve a Fatal alert, follow the action recommended in the alert Event to repair the server then click the Clear action to restore server operation.
The Pending Changes table list server setting changes that have been saved but have not yet been applied to the server.
The Recent Changes table lists server setting changes that have been applied in the last 10 minutes. Setting changes that occurred more than 10 minutes ago are located in the audit logs under Reports > Events.
Server Sessions
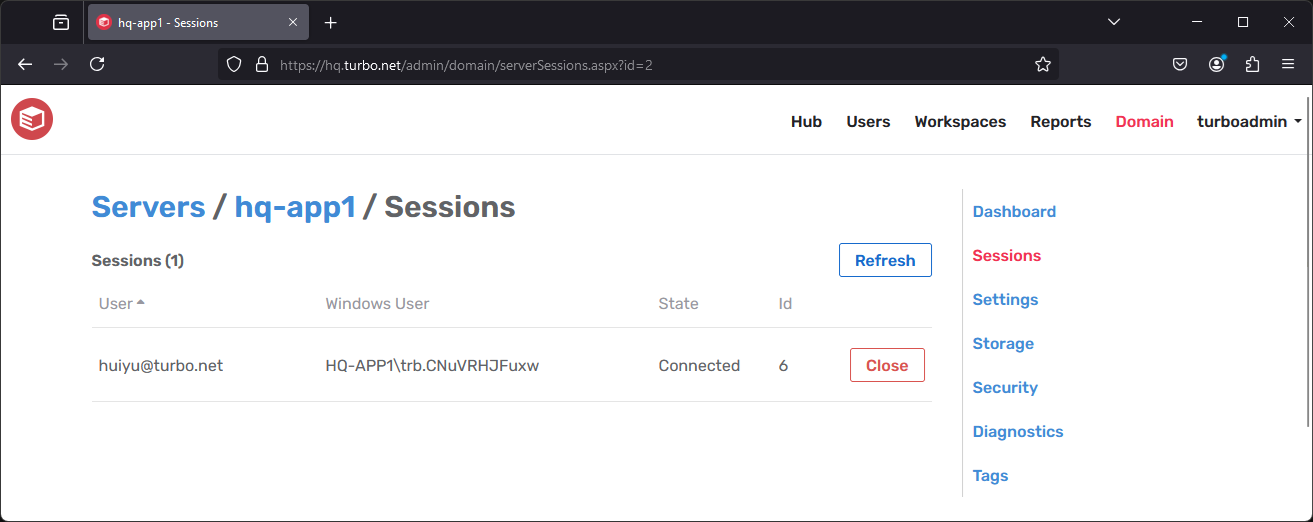
The Sessions section lists all user sessions that are running on the server except for the local system user. This section is only available for servers with the application role.
Administrators may manually log off users by clicking the Close action, which will issue a log off command from the Turbo service user. In order for this action to succeed, the Turbo service user must have permission to log off the user. Please be aware that logging off users may result in the loss of unsaved data.
Server Settings
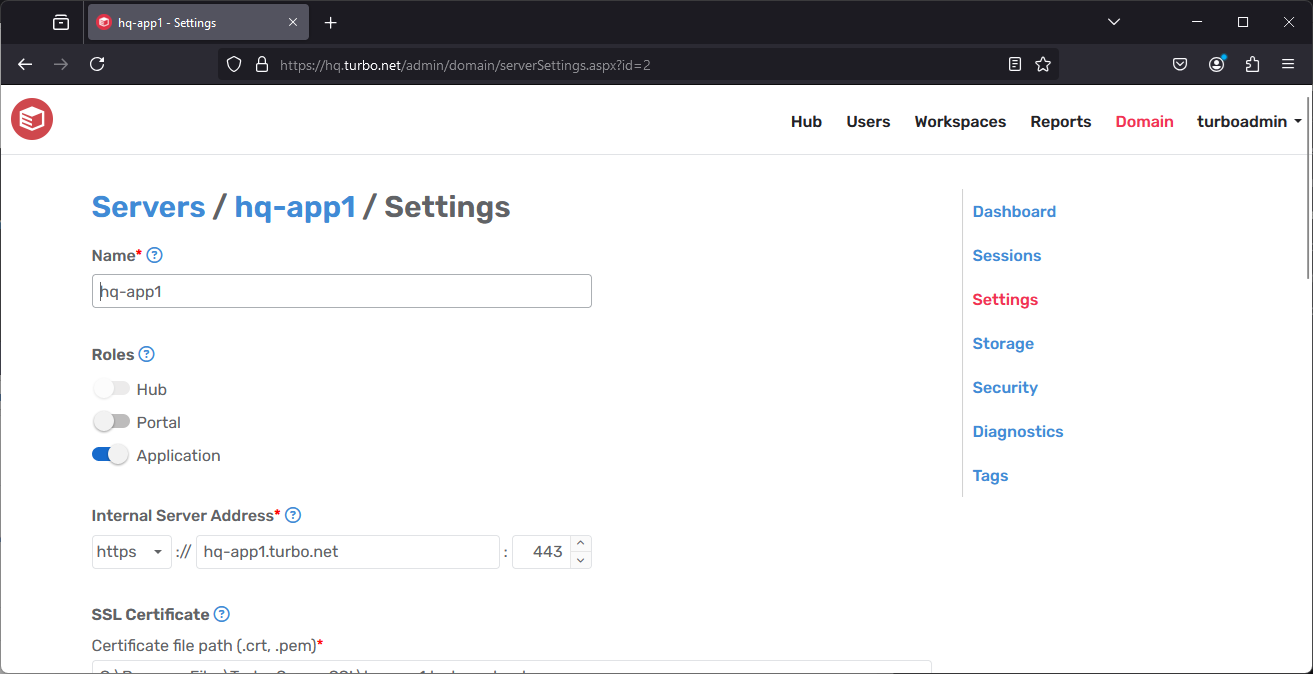
Name: A display name for the server, shown in the Administration Site.
Roles: The roles for which this server is responsible, including: Hub , Portal, and Application Server. Changing the server role will trigger a service restart which may take a few minutes to complete.
Internal Server Address: Configures the web service bindings for where the hub, portal, broker, and public web services will be hosted.
SSL Certificate: Configures the SSL certificate files that are used for HTTPS web service bindings. The provided file paths must point to permanent locations that are available to the service account.
Use Advanced Video Coding: Enables the use of Advanced Video Coding (H.264) for remote application streaming if the Application Server supports it. This setting is only available for servers with the Application role enabled.
User Profile Pool Size: Number of pre-created user profiles on the application server. The default size is 25. The recommended size is the number of concurrent launches expected for the server.
Cache User Profiles: Enables caching of temporary profiles for application server role indefinitely. If disabled, any files saved by a temporary profile user on the application server will be removed along with the profile 10 minutes after the session ends. Users should be instructed to save to cloud storage or a redirected network drive. All non-administrative local accounts will be removed according to the Temporary User Profile Lifespan setting.
- User Profile Lifespan: Length of time since last login that a temporary profile will be cached, if cache temporary user profiles is enabled. Default to 7 days. Profile expirations are checked in 10 minute intervals.
Java Virtual Machine Settings: Configures the JVM settings for the Hub and Broker Java processes. Available settings include:
- Heap Space: Configures the maximum JVM heap space allocated for the Hub and Broker Java processes. This setting is only available for servers with the Hub or Portal roles enabled.
- Proxy Server: Configures the JVM proxy server for all outgoing http(s) requests from the Hub Java process. This setting is only available for servers with the Hub role enabled.
Server Storage
Application Image Path: The path where the application server will store SVM images. The default value is 'allusers'. Leave blank to prevent the service from setting the value. If the value is changed to a different folder such as 'E:\turbo-images', it must be changed to 'allusers' to restore the default value. Clearing the textbox will leave the value to 'E:\turbo-images'. Multiple application servers may share the same folder.
Image Cleanup: Removes images on the server after the given interval. Leave blank to disable image cleanup. Target image cache size must be specified if image cleanup is enabled.
Hub Image Cache: Configures an image cache path where the Hub will store SVM images. This prevents the redownload of the same application when ran by different users. This can be a local file path which will be shared by all users on the same device, or a network path which may be shared by all users across multiple devices. This setting is only available for servers with the Hub role enabled.
The Cache action may be used to manually populate the image cache with the latest revision of all repositories in the Hub.
Images in the cache are removed if the repo's revision are deleted from the Hub. Cached images may be manually removed from the server by deleting the file from the Windows Explorer.
Peer-to-peer Image Distribution: Enables peer-to-peer image sharing through the torrent protocol. Requires port 6881 to be open.
Hub Storage Path: Sets the hub storage path to a custom path. Ensure the target path is empty and not used by other applications, and has sufficient storage for storing all images and persisted data. The path can be changed later, but will require momentary downtime of the hub depending on how much data will be moved. The service user must have full access to the target path. Please see the Backup and Recovery documentation for additional details and troubleshooting.
Hub CDN URL: The Hub block storage CDN URL. The Hub CDN URL must be a valid absolute http(s) URL. If the URL is not specified, blocks will be fetched from the original Hub URL.
For more information on the Hub CDN and common CDN configurations, see Configuring Content Delivery Network (CDN)
Hub CDN Max File Size: The maximum file size supported by the CDN provider, in megabytes. Supporting clients will download files exceeding this size using the Turbo synchronization protocol.
Block Storage: Scans and repairs errors in the block storage. Images should not be pushed to the server until the repair is complete. This action is only available for servers with the Hub role enabled.
Optimize Storage: Scans and deletes unreferenced blocks from the block storage. This action is only available for servers with the Hub role enabled. Optimize storage requires free space equal to the current size of the block storage size to complete successfully.
Server Security
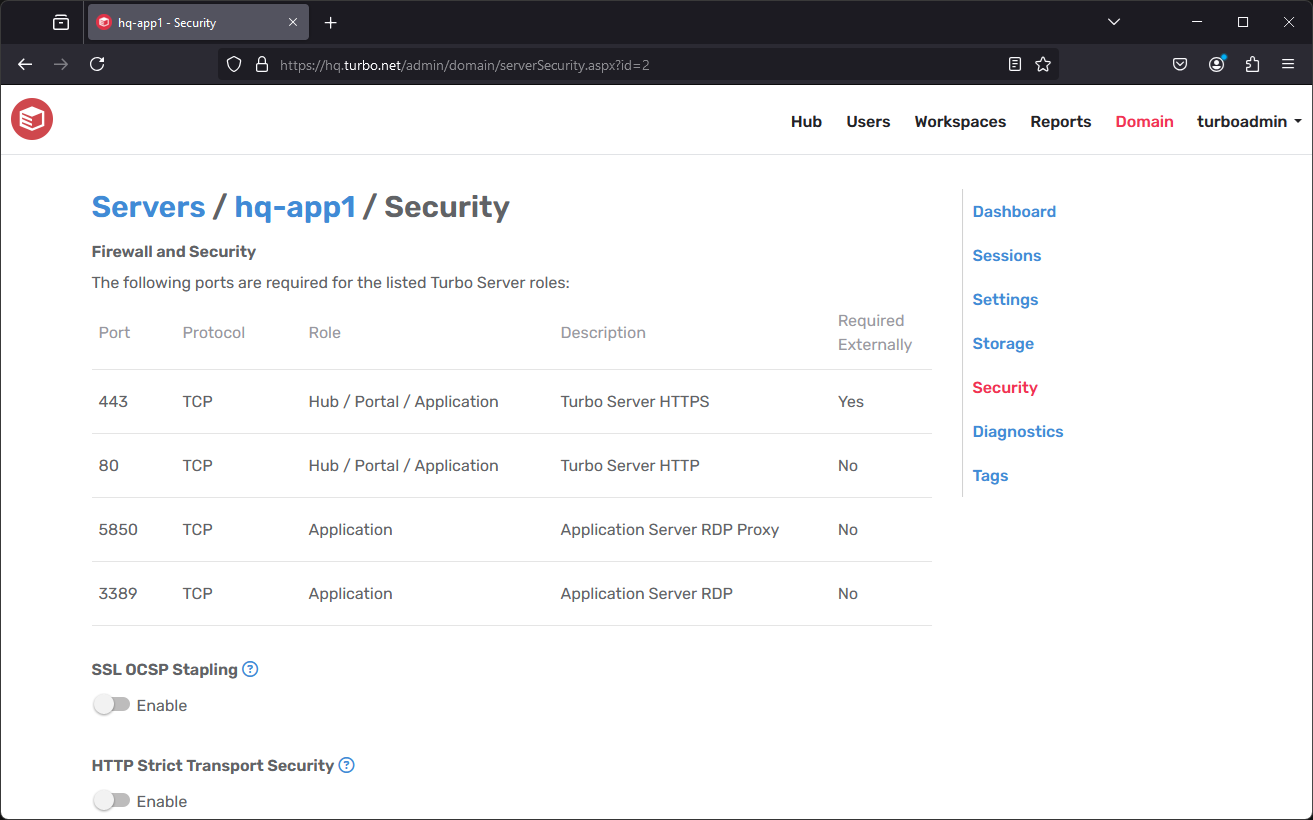
The Server Security page displays the required Windows Firewall configurations as well as other configurable security settings.
Firewall and Security: A list of ports that are required by the selected server roles. For a full list of ports that are used by Turbo Server, please refer to Firewall and Security.
SSL OCSP Stapling: Enables OCSP Stapling for SSL. SSL must be enabled with the intermediate certification file specified.
HTTP Strict Transport Security: Enables the HTTP Strict Transport Security (HSTS) header on all requests. The HSTS header uses a 1-year expiration and leaves all other options as default. The header is disabled by default.
NOTE: If you downgrade your server to HTTP, the HSTS setting must be cleared from the client browser in order to re-enable access the server.
Server Diagnostics
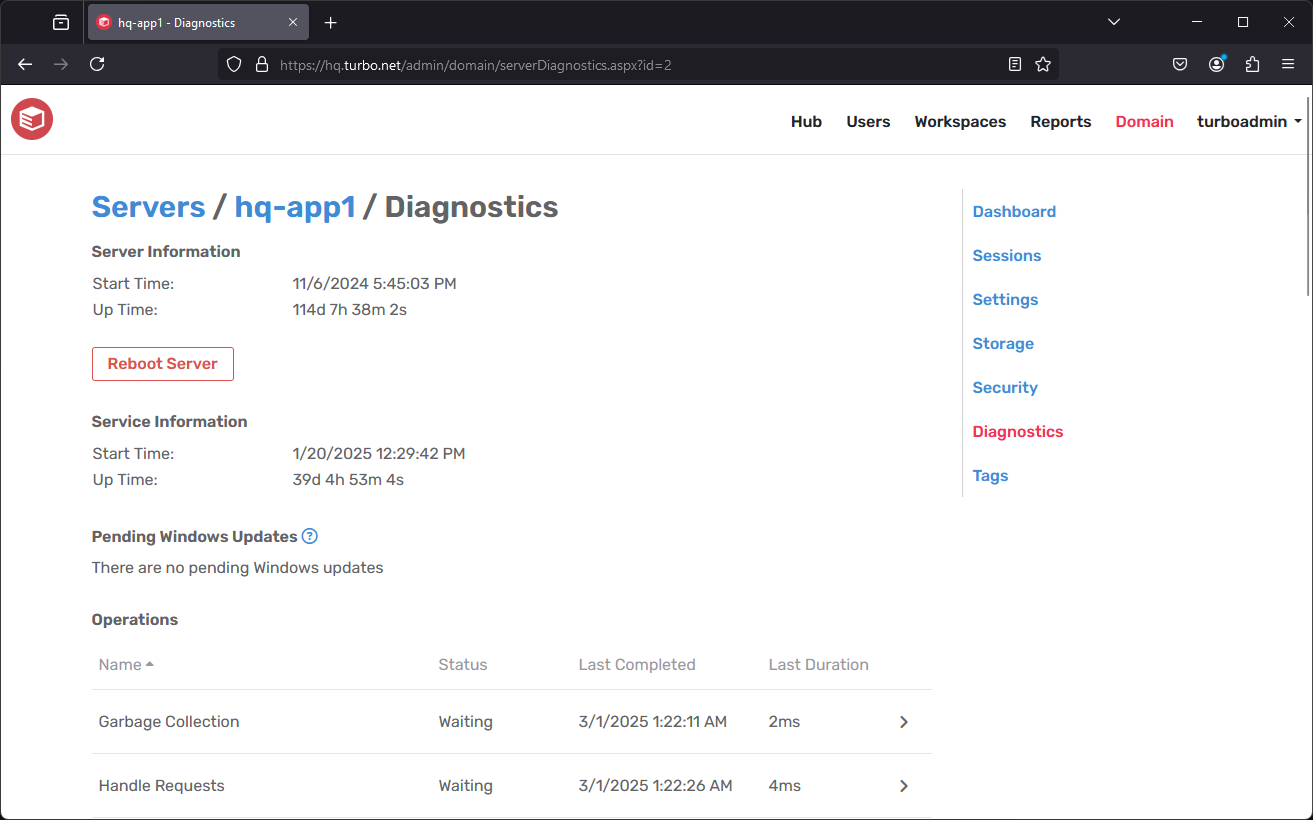
The Server Information section displays the start time and up time of the Windows server that Turbo Server is installed on.
Clicking the Reboot Server button will reboot the server (shutdown and restart Windows). Any sessions running on the restarting server will be terminated without warning, and any Windows updates listed in the Pending Windows Updates section will be installed. Use the Reboot Server button in case the server appears unresponsive as a last resort.
The Service Information section displays the start time and up time of the Turbo Server service.
The Pending Windows Updates section displays all Windows updates that require a system reboot and are pending install on the Windows server.
The Tracker Status section displays peer-to-peer image distribution tracker status.
The Operations table lists all operations that are managed by the Turbo service as well as their last know status. If an operation failed to complete successfully, the operations table will report an Error status and a short description of the error.
The Server Logs section displays the most recent Turbo service logs. From this page administrators can create and download log archives directly from the administration site.
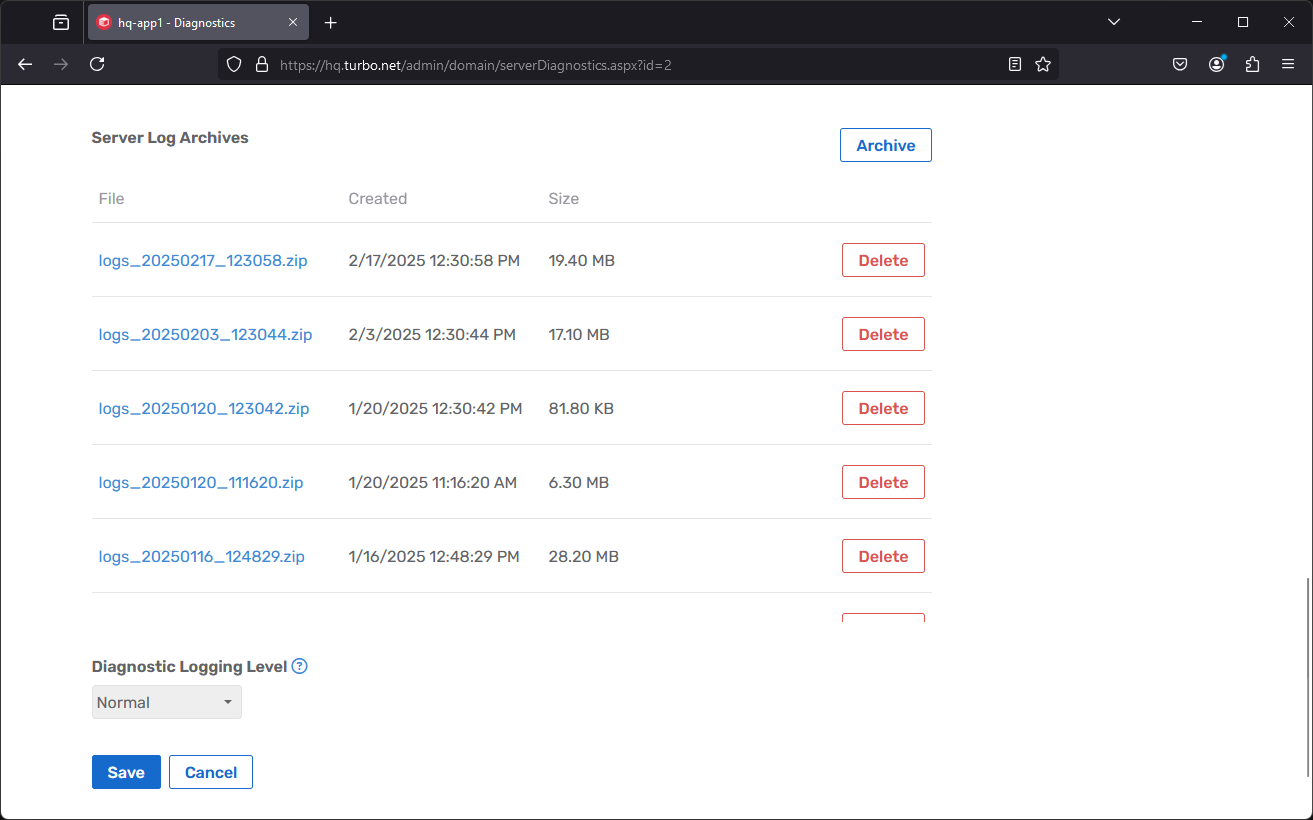
Clicking the Archive button will gather all of the logs across the various Turbo Server services and compress then into a single .zip file. Once compressed, the archive will be made available for download and the original log files will be cleaned up.
The Diagnostic Logging Level setting allows administrators to configure level of diagnostic information that will be included in the server logs. For example, the Portal logs will include additional information about memory usage and active connections.
Server Tags
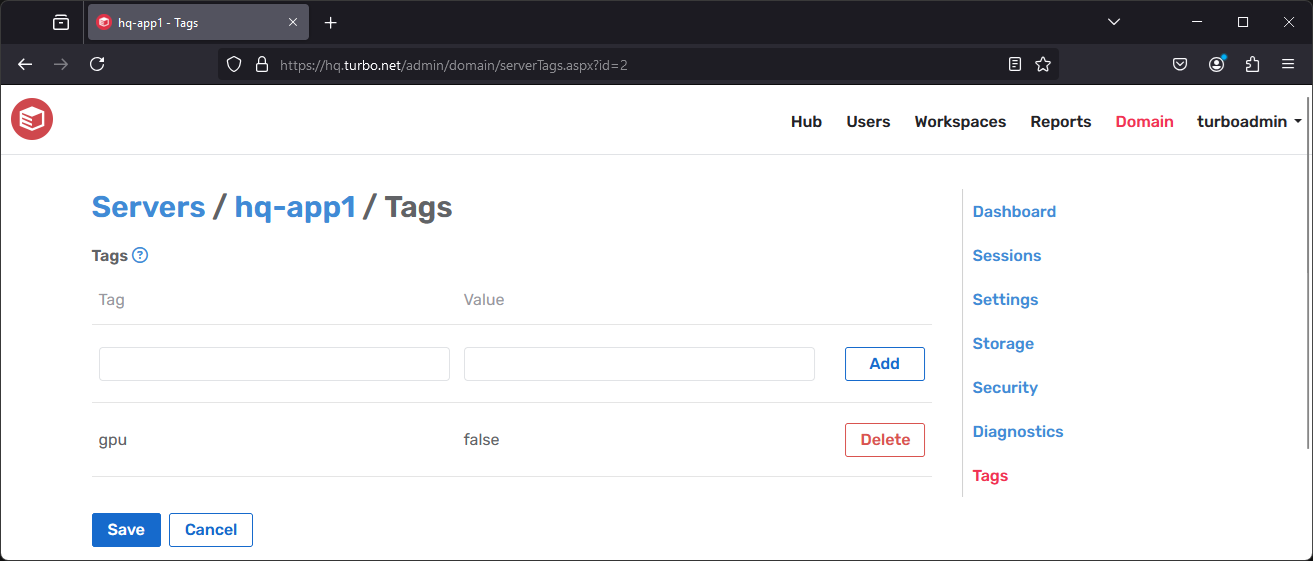
Server Tags are user-defined name value pairs that can be used to organize, manage, and filter servers. Server tags must include a name and may optionally include a value. Server tag names and values are case-insensitive.
For example, tags may be used to restrict workspace application launches to application servers that meet certain requirements, such as GPU capabilities or licensing.
Cloud Infrastructures
The Cloud Infrastructure page allows administrators to view and manage connections with various cloud infrastructures such as Azure. These connections may be used to deploy additional applications servers and join them to the Turbo Server farm.
Prerequisites
Cloud Infrastructure currently only supports Azure environments. Support for other cloud infrastructures may be added in the future.
The Turbo Server farm must be running in Azure with an Azure SQL Database connection. Adding Azure application servers to a on-premises Turbo Server installation is not supported.
For more information on setting up an Azure Turbo Server farm, see the Turbo Server AMI setup docs.
Azure Setup Guide
Before any application servers can be deployed to Azure, the Azure tenant must be configured with an application registration that has permissions to create new resources.
First, the application registration must be created. This application will be used to generate an access token to the Azure tenant with a limited set of permissions. To create the application registration:
- Login to the Azure Portal and switch to your desired directory
- Go to App Registrations and click New Registration
- Enter a descriptive name such as
Elastic Deploymentthen click Register. The other settings can be left as default. - Make note of the Application (client) ID and Directory (tenant) ID for later
- Go to API Permissions > Add a permission
- Select Azure Service Management > user_impersonation then click Add permissions
- Click Grant admin consent
- Go to Certificates & secrets
- Click Client secrets > New client secret
- Enter a desired description and expiration date then click Add. Make note of the key value for later.
Next, the application registration must be granted the Contributor role. This will allow the application registration to create Azure resources within the Azure subscription. To grant the Contributor role:
- Login to the Azure Portal and switch to your desired directory
- Go to Subscriptions > Pay-As-You-Go. Make note of the Subscription ID for later.
- Go to Access control (IAM) > Role Assignments
- Click Add > Add role assignment
- Select the Contributor role
- Click Members
- Click Select Members and add the application registration that you created in the previous section
- Click Review + Assign
Cloud Infrastructure Settings
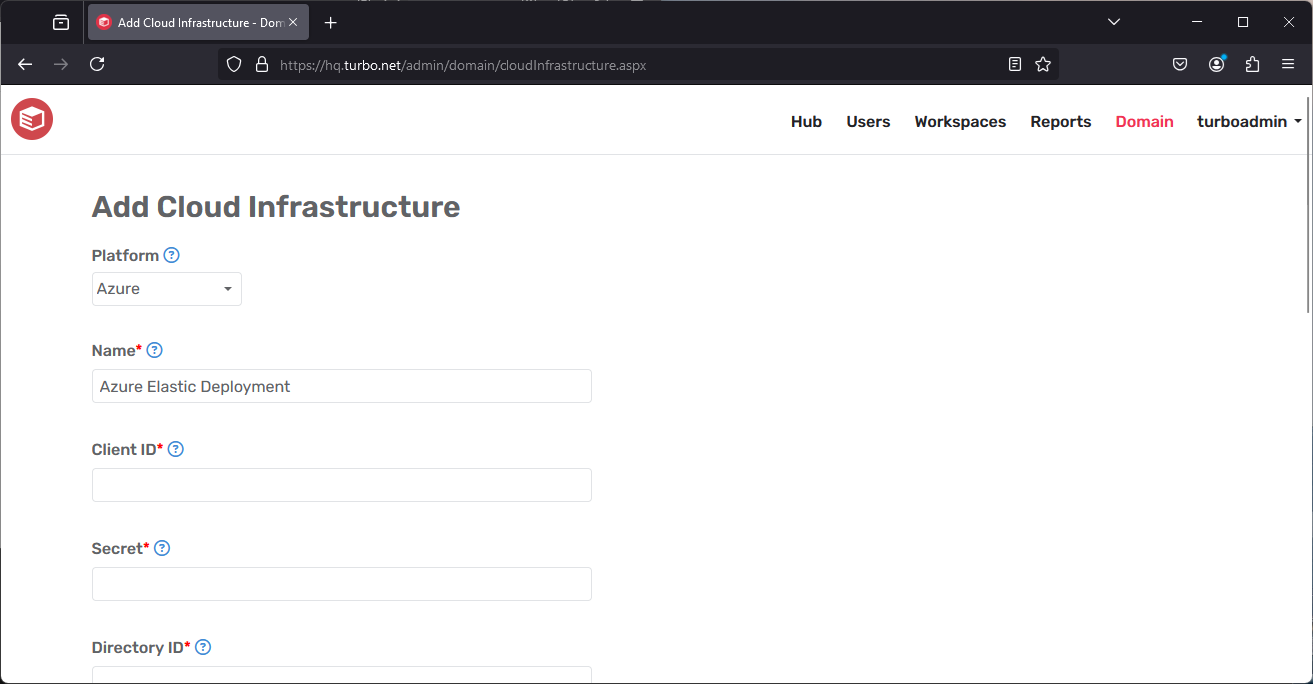
- Platform: The cloud infrastructure that is being integrated, such as Azure.
- Name: The display name of the cloud infrastructure that will be shown on the Turbo Server administration site.
- Client ID: The Client ID from the cloud infrastructure application registration. For Azure this is the Application (client) ID from the Setup Guide.
- Secret: The Client Secret from the cloud infrastructure application registration. For Azure this is the Client secret value from the Setup Guide.
- Directory ID: The Directory ID from the cloud infrastructure application registration. For Azure this is the Directory (tenant) ID from the Setup Guide.
- Subscription ID: The Subscription ID from the cloud infrastructure application registration. For Azure this is the Subscription ID from the Setup Guide.
- Region: The region to which resources will be deployed, such as westus or eastus2. The region must be available in your subscription.
- Resource Group Name: The name of the resource group to which resources will be deployed. A new resource group will be created if the specified resource group is not found.
- Virtual Network Name: The name of the Virtual Network to which deployed resources will be assigned.
- Virtual Network Subnet: The name of the Virtual Network Subnet to which deployed resources will be assigned.
- Virtual Network Resource Group Name: The name of the resource group where the Virtual Network is located
The above configurations can be tested by clicking the Test button. This will verify that the Client ID, Secret, Directory ID, Subscription ID are present and configured correctly in Azure. It will also check that the Region is available in the subscription.
Domain Settings
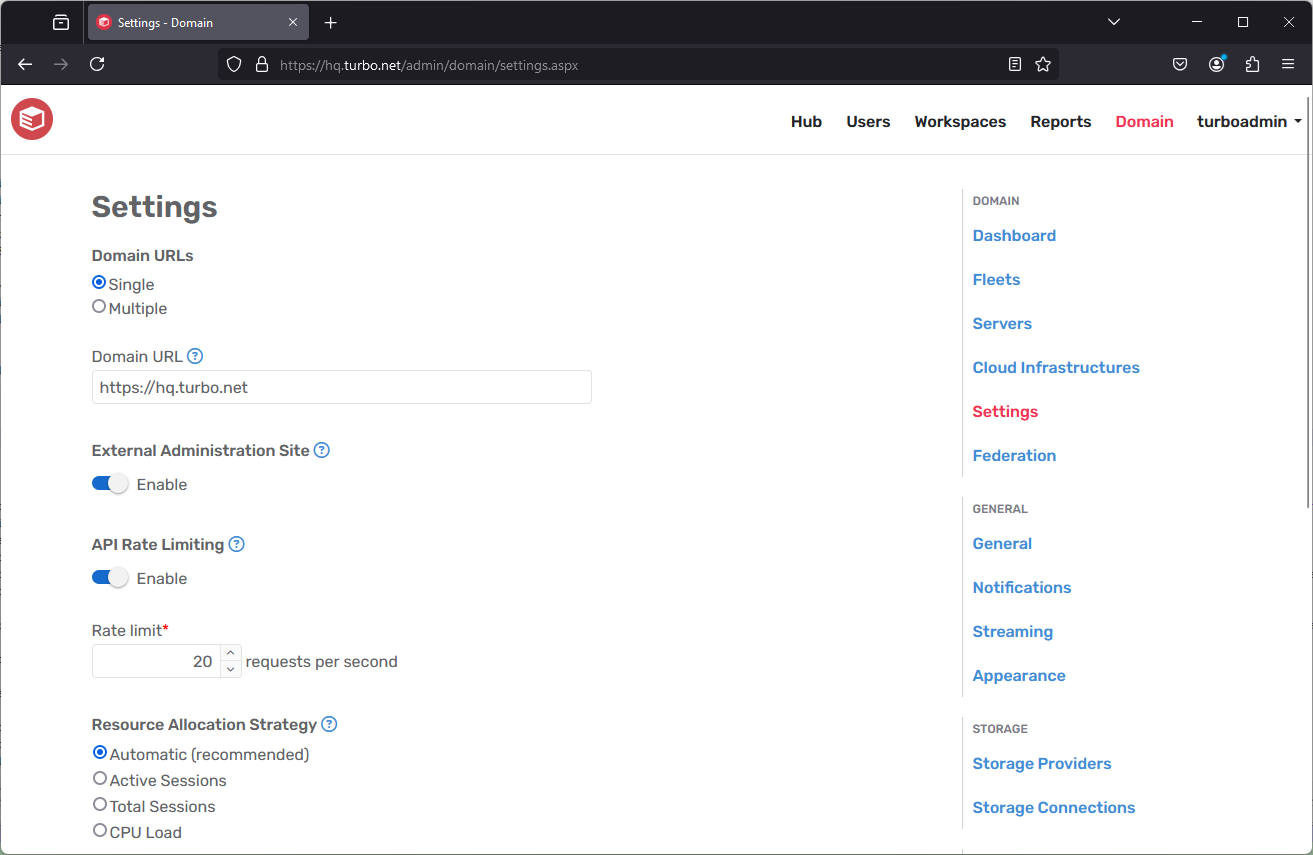
The Settings page lists allows you to configure domain-wide settings, including:
- Domain URL: The public facing URL intended for end users to access Turbo. The firewall or load balancer should resolve this to your portal instances. For more information, see Understanding the Domain URL.
- Hub Domain URL: The public facing URL for Turbo Hub web services. If this field is not specified, the Domain URL is used.
- Portal Domain URL: The public facing URL for Turbo Portal web services. If this field is not specified, the Domain URL is used. Users must use this URL to access the portal and is typically the same as the Domain URL.
- External Administration Site: Allows external network access to the administration site from the domain url.
- API Rate Limiting: Limits the maximum number of API requests allowed per IP address per second. If this limit is exceeded, the request is rejected with a 429 Too Many Requests error response. Rate limiting is enabled by default with a limit of 20 requests per IP address per second. Enable rate limiting to deter denial of service or brute force password cracking attacks. The rate limit should be disabled if there will be many users attempting to use the service from a single IP address.
- Resource Allocation Strategy: The load balancing strategy used to allocate applications to application servers. The available strategies are:
- Automatic: New application requests will be allocated round-robin to active application servers.
- Active Sessions: New application requests will be allocated to the active application server with the lowest active session count. Note that active session counters may be delayed until the application is fully launched and may not be balanced if a user launches many applications at the same time.
- Total Sessions: New application requests will be allocated to the active application server with the lowest total session count.
- CPU Load: New application requests will be allocated to the active application server with the lowest CPU load.
- Default Launch Mode: The default launch location used when launching applications from the dashboard. If an application is configured with its own launch location, that setting will take precedence. The available options are:
- Run in Cloud (HTML5): Application launches will open a new browser tab to which the application will stream from the application server.
- Run in Cloud (Windowed): Application Launches will open a new browser tab and attempt an auto-launch. If a native client is installed, the application will stream from the application server.
- Run on My PC (Local): Application Launches will open a new browser tab and attempt an auto-launch. If a native client is installed, the application will run on the local machine.
- URL Redirects: Redirects requests from the host name to the target URL with a permanent redirect response (301). The host name must resolve to the domain in order for the redirect to occur.
Domain Federation
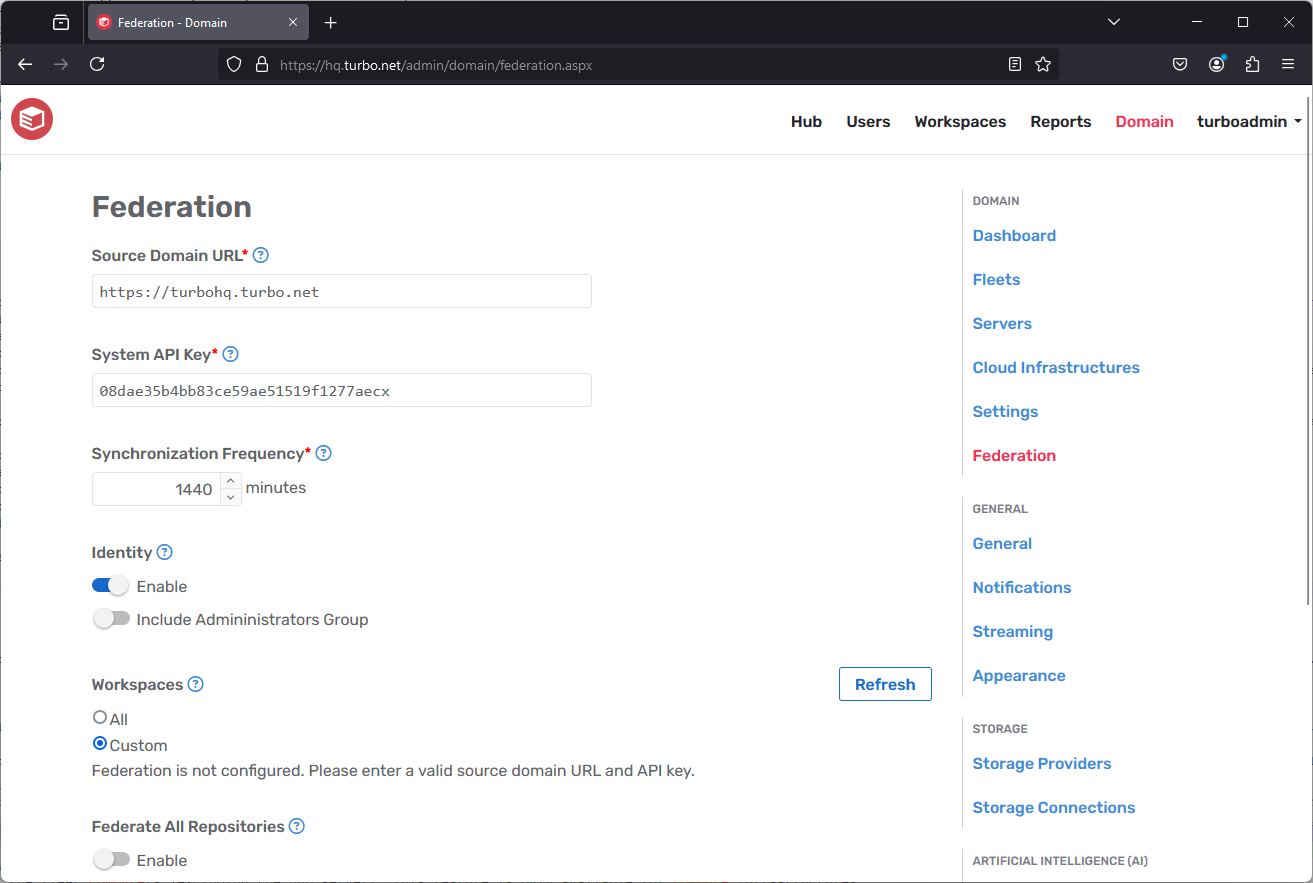
The Federation page allows you to configure federation across multiple domains to reduce setup time and keep domain resources in sync. According to these settings, the server will will periodically check the source domain for updates and replicate any changes.
A domain federated server replicates the source server's workspaces, workspace permissions, and the workspaces' associated image repositories. In addition, the source server's users, groups, directory services, and identity method are also replicated to allow the users to run applications from workspaces using the same login identity. If the identity method is an external authentication method such as Azure AD, the subdomain's redirect url must be added in the Azure Portal.
If an existing login name or built in group, directory service, or user exists on the server, it will not be replicated. For example, the built in SYSTEM user will not be replicated. Replicated users will automatically belong to the 'Everyone' built in user group, but not the Anonymous or Administrator built in user groups.
If an existing workspace with the same url friendly ID exists on the subdomain, it will be overwritten. If the source workspace permission references a built in group (Anonymous, Administrators, or Everyone), it will be normalized to reference the subdomain's built in group and automatically apply to the users belonging to those groups.
The available configurations are described below:
- Source Domain URL: A federation source URL from which domain resources will be replicated.
- System API Key: The API key used to access federation resources from the federation source. This API key must be configured as a system-level key on the source server. See Managing API Keys for information on configured API keys.
- Default Synchronization Frequency: The frequency at which this server will check the federation source for updates.
- Identity
- Enable: Federate identity data from the source domain, including users, groups, directory services, and authentication settings.
- Include Admininistrators Group: Identity federation will also include the Server Administrators group permissions.
- Workspaces
- All: Federate all workspaces from the source domain, automatically adding new workspaces. All repositories associated with the selected workspaces will also be federated.
- Custom: Federate selected workspaces from the source domain. New workspaces from the source domain must be manually added to the list of selected workspaces.
- Federate All Repositories: Federate all repositories from the source domain.
- Request Forwarding: Automatically pull repositories from the federated domain when a local repository is not found.
- Revision History Length: Number of application revisions to pull from the remote repository.
The Reset button clears the configured federation settings, disabling federation.
General
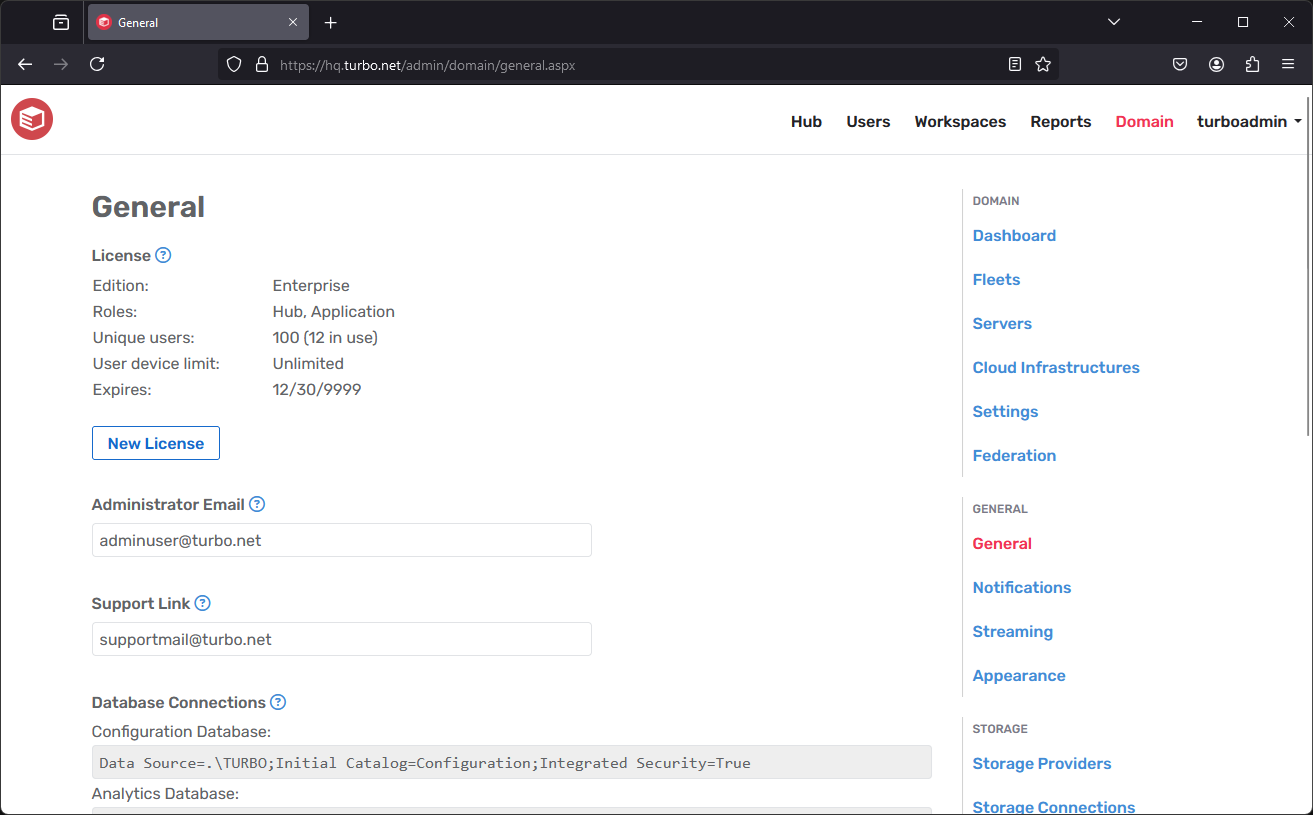
The General page provides options to configure and customize Turbo Server. The page contains the following sections:
- License: Provides an overview of information associated with the current Turbo Server license, including number of seats, allowed portals, computer name, and machine identifier. If server users are licensed to run applications on more than one machine, this number is reflected here.
- New License: click this button to view or update your Turbo Server license.
- Administrator Email: Users are directed to this email address if they encounter any errors or issues while using Turbo Server.
- Support Link: The link used for administrative support and web server error messages. Has priority over administrator email if both are specified.
- Database Connections
- Configuration Database: Displays the connection string for the Configuration database.
- Analytics Database: Displays the connection string for the Analytics database.
- External Database Connections: The connection strings used by servers deployed on external compute infrastructures.
- Notice and Consent: Users will see a notice and consent dialog after logging into the Portal. They must accept the notice and consent dialog before using the Portal. Markdown syntax is supported for links, headers, font styles, and more.
Notifications
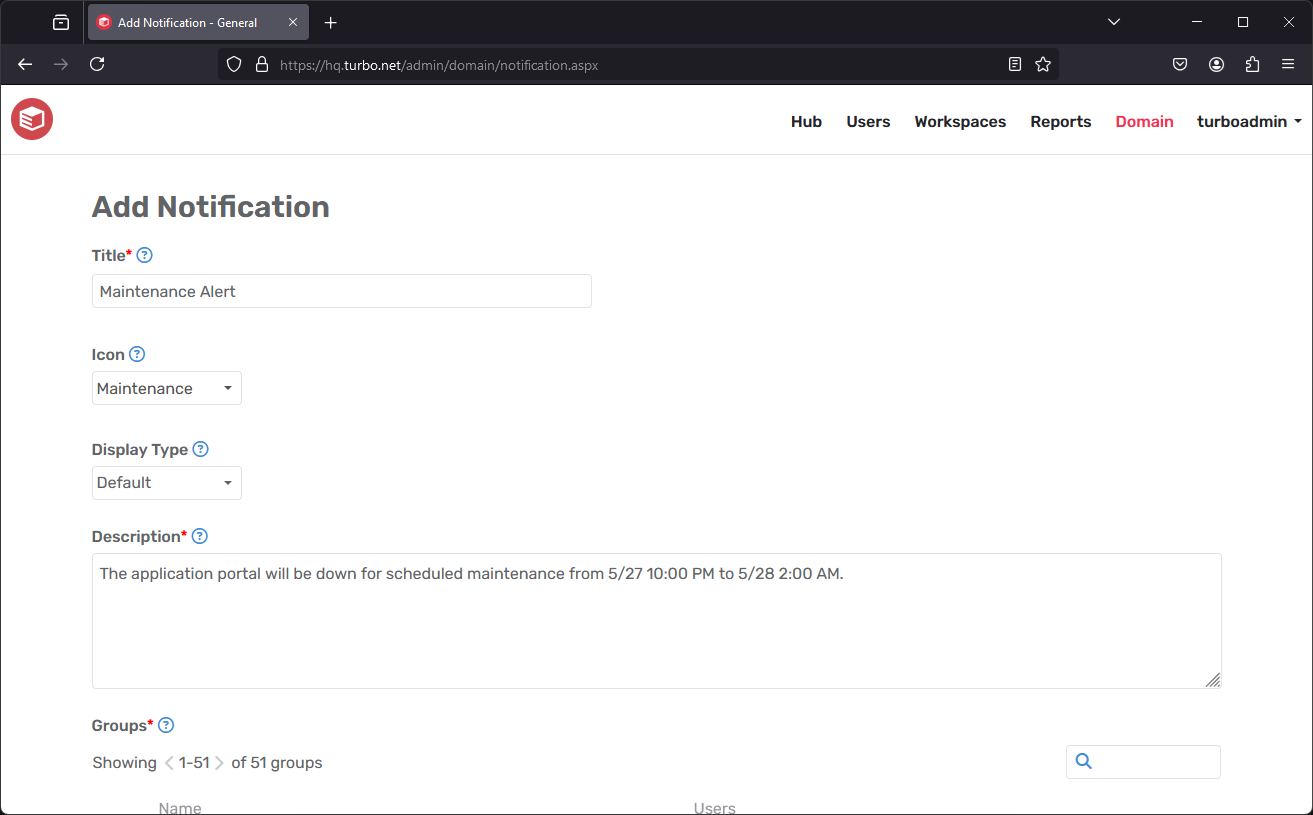
The Notifications page allows admins to notify groups of Turbo Server users with custom message, such as service maintenance periods or product updates. Notifications may be customized with the following fields:
- Title: The message title that will be displayed to the end user in the notification.
- Icon: A preset or custom icon that will be displayed to the end user in the notification. When uploading a custom icon, we recommend using an image that is at least 80px x 80px.
- Display Type: The display type for this notification. The available types are:
- Default: A low priority notification, displayed in a notification dropdown. This is the default setting.
- Toast message: A notification that is shown at the top of the Portal dashboard. This notification may be dismissed and does not interrupt the user.
- Description: The message body that will be displayed to the end user in the notification.
- Groups: The user groups that this notification will be sent to.
The end-user may view their notifications on the Turbo Portal under the notifications dropdown, which are listed in order from most recent to least recent. Notifications are sent immediately upon submit, but may be changed later on through the notifications settings page.
Streaming
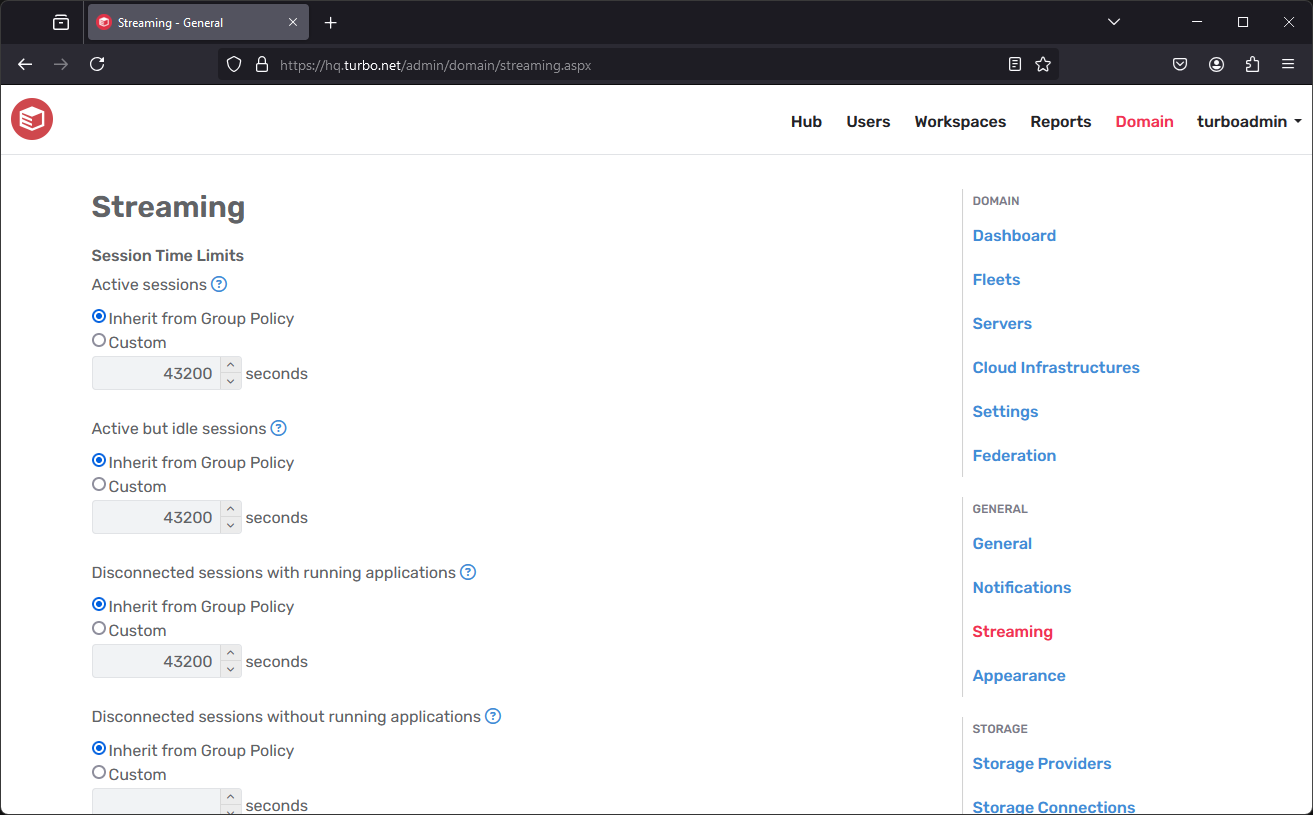
The Streaming page provides remote application streaming configurations for the Application servers.
Active sessions: The maximum amount of time that a Remote Desktop Services session can be active before it is automatically disconnected.
This setting corresponds to the Set time limit for active Remote Desktop Services sessions Group Policy setting. The value 0 will set the Group Policy setting toNever.
Turbo Server defaults this setting to21600000.Active but idle sessions: The maximum amount of time that an active Remote Desktop Services session can be idle (without user input) before it is automatically disconnected.
This setting corresponds to the Set time limit for active but idle Remote Desktop Services sessions Group Policy setting. The value 0 will set the Group Policy setting toNever.
Turbo Server defaults this setting to21600000.Disconnected sessions with running applications: The maximum amount of time that a disconnected session remains active on the server.
This setting corresponds to the Set time limit for disconnected sessions Group Policy setting. The value 0 will set the Group Policy setting toNever.
Turbo Server defaults this setting to300000.Disconnected sessions without running applications: How long a user's RemoteApp session will remain in a disconnected state after closing all RemoteApp programs before the session is logged off from the RD Session Host server.
This setting corresponds to the Set time limit for logoff of RemoteApp sessions Group Policy setting. The value 0 will set the Group Policy setting toImmediately.
Turbo Server defaults this setting to600000.
NOTE: Windows terminal services will honor this value only if the RemoteApp session remains connected until the application is successfully terminated. If the HTML5 client browser process is terminated before the application can disconnect vai RemoteApp shutdown procedure, the session will remain for a longer than expected disconnected state. The RemoteApp shutdown procedure takes up to 20 seconds after the application window is closed. To learn more, see the Microsoft documentation.Concurrent Session Limit: The maximum number of remote sessions that a user can have open simultaneously. If a user exceeds this limit, they will be unable to launch additional remote sessions from the Portal dashboard until they close some of their existing remote sessions. This limit does not impact other launch methods such as local or installed launches.
Enable Drive Redirection: Enables the mapping of client drives when streaming remote applications.
This setting corresponds to the Do no allow drive redirection Group Policy setting.
The Turbo Server installer does not define a default value for this setting. Resetting this value will set it toNot configured.
The default Windows value for this setting isNot configured.Network Drives: Maps network drives when streaming remote applications. Network drives will be mapped when users run sessions on the application server. Network drive paths support Windows environment variables.
The\\tsclient\{path}can be used as the network drive path but is only supported when connecting with clients that redirect drives. For example,\\tsclient\ccan be used to map the to local C: drive when connecting using Turbo for PC, and\\tsclient\Homemay be used to map to the local Home folder when connecting using Turbo for Mac.
NOTE: Network drives will not be mounted if the path is invalid or inaccessible to the remote user. Furthermore, network drive letters that conflict with existing local or network drives will not be mounted.Require NLA: Enables Network Level Authentication, requiring users to authenticate before establishing a remote connection.
This setting corresponds to the Require user authentication for remote connections by using Network Level Authentication Group Policy setting.
Turbo Server defaults this setting toDisabled.Restrict NTLM: Incoming NTLM traffic: Allows or denies incoming NTLM traffic from client computers, other member servers, or a domain controller.
This setting corresponds to the Network security: Restrict NTLM: Incoming NTLM traffic Group Policy setting.
The Turbo Server installer does not define a default value for this setting. Resetting this value will set it toAllow all.
The default Windows value for this setting isNot defined, which is equivalent toAllow all. The server will allow all NTLM authentication requests.Restrict NTLM: NTLM authentication in the domain: Allows or denies NTLM authentication within a domain from this domain controller.
This setting corresponds to the Network security: Restrict NTLM: NTLM authentication in this domain Group Policy setting.
The Turbo Server installer does not define a default value for this setting. Resetting this value will set it toDisable.
The default Windows value for this setting isNot defined, which is equivalent toDisable. The domain controller will allow all NTLM authentication requests in the domain where the policy is deployed.Preemptive Authentication: Allows the HTML5 client to show a login dialog when launching applications with Ask for Credentials authentication. If disabled, the HTML5 client will connect without credentials and defer to the remote login window. This setting does not apply to other clients or profile modes.
The default value for this setting isEnable.
NOTE: If Network Level Authentication is required, then launching applications in the HTML5 client with Ask for Credentials will fail with an authentication error.
The Inherit from Group Policy option will not update the local group policy and the behavior will be determined by existing GPOs or Windows defaults.
The Custom option updates the Local Group Policy on all application servers in the Turbo Server farm. Please be aware that this setting will always be overriden if your server is joined to a domain and the equivalent Domain Group Policy is defined.
The Reset button will reset the local group policies to their Turbo Server default values and remove all configured network drives on each application server. See each individual setting for more information on their default values. Confirming the reset confirmation dialog will apply the changes and reload the page, saving the settings form is not required.
Setting changes are applied approximately once every 20 seconds. You may need to exit and relaunch the group policy editor (gpedit.msc) to see the updated settings on the application servers if it was already opened.
Appearance
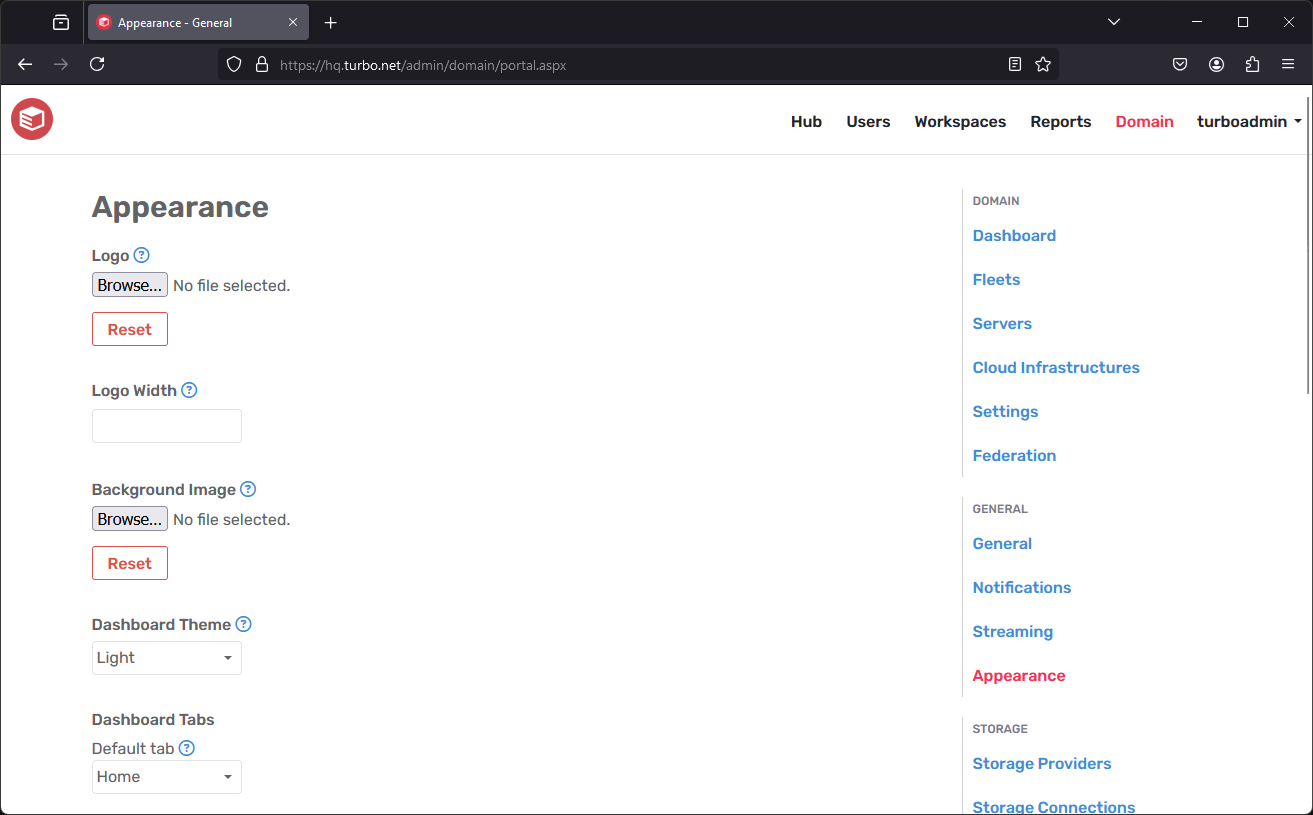
The Appearance page provides customization options for the Turbo Server portal, such as icons and background images. Appearance changes can take up to a couple minutes to apply to the Portal site.
Dashboard Theme: Changes the appearance of the Portal dashboard site by altering the text colors and default background image. The available themes are:
- Light: Dark text on a light background. (Default)
- Dark: Light text on a dark background.
Internet Explorer 11 only supports the light theme. Viewing alternate themes in Internet Explorer 11 or below and may result in degraded visuals.
Dashboard Tabs: Changes the appearance of the Portal dashboard site by altering the tab behavior and visibility.
- Default tab: The tab that is initially displayed when accessing the Portal dashboard.
- Tab visibility: The tabs that are visible on the Portal dashboard. At least one tab must be visible, including the default tab.
Show Launch Page: When enabled, application launches will open a new browser tab to a launch landing page.
This page provides detailed launch status information and a Turbo client download link.
When disabled, application launches will launch directly from the dashboard without opening a new tab. A notification will be displayed at the top of the page with some basic launch status information.
Run in Cloud (HTML5) is not affected by this setting and will always open a new tab to the HTML5 client.
The launch page is enabled by default.Show Client Download Banner: When enabled, a download banner will appear at the top of the Portal dashboard page that provides a Turbo client download link appropriate for the user's device. If no such client is available, the download banner is not shown. This banner can be dismissed by the end-user.
The download banner is enabled by default.Show Help Link: When enabled, a "Help" link will appear in the Portal's header that opens the provided URL in a new browser tab.
The help link is disabled by default.
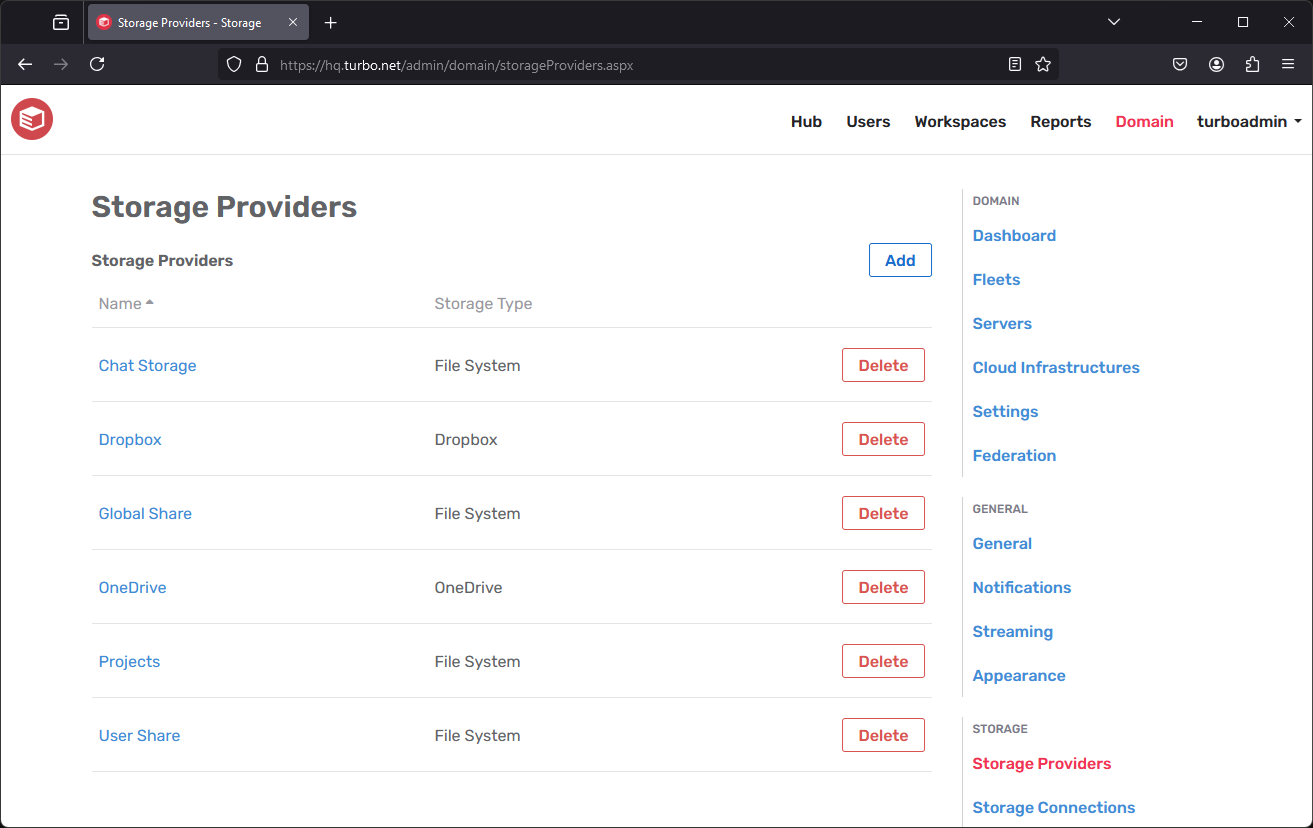
Storage Providers
The Storage section provides options to configure storage with a variety of third-party services as well as local network storage.
Turbo Server currently supports the following storage providers:
The Storage Providers page allows administrators to view and manage integrations with a variety of third-party services as well as local network storage. Administrators or end-users may then create connections using these integrations to login to their cloud storage accounts and access their files while running applications.
Add Storage Provider
Click on the Add button to add a storage provider.
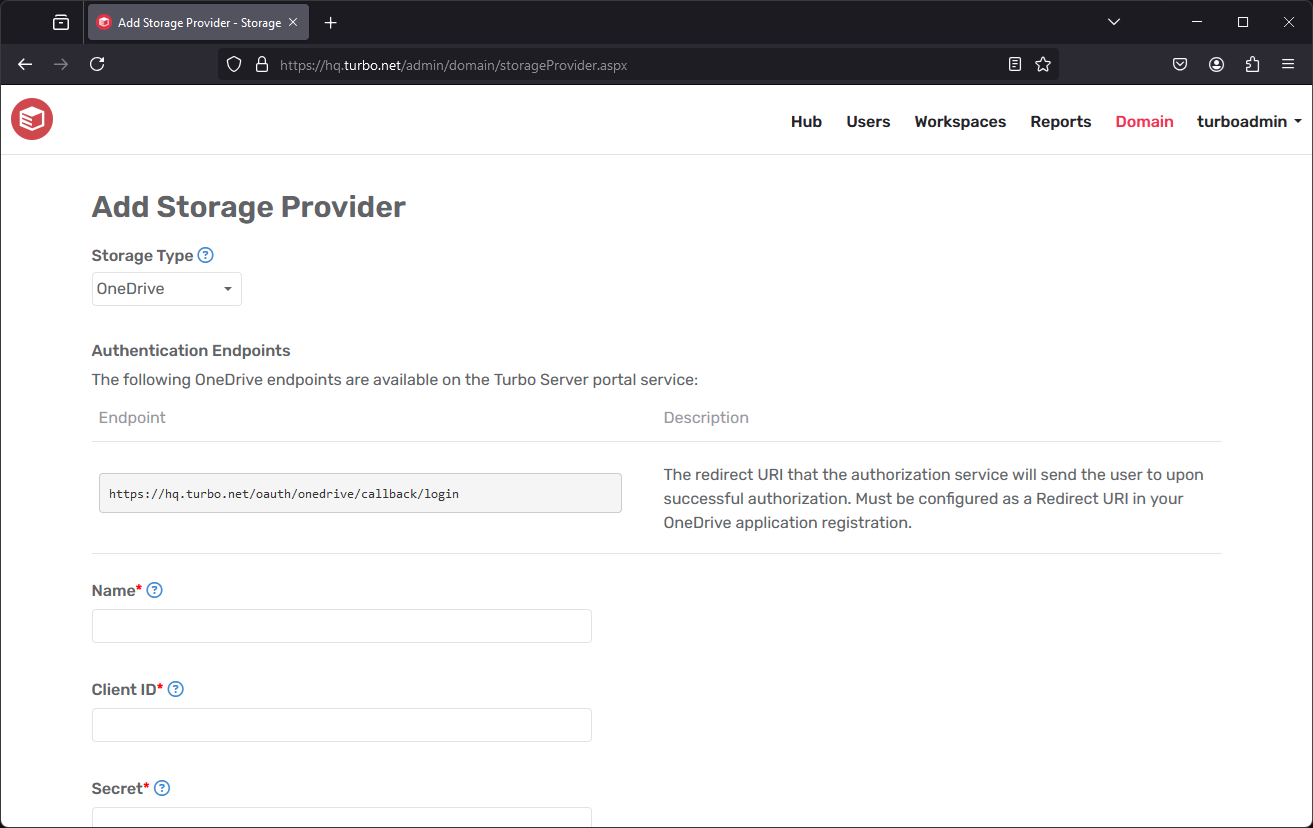
Storage Type: The storage type you are integrating with Turbo Server. Instructions for setting up a Storage Provider connection are available for:
Name: The display name of the storage provider.
Client ID/Secret/Other: The application registration information for the storage provider. Varies by storage provider type, see instructions above for more information.
Connection Mode: Determines whether the connection context is per user or for all users.
- Per User: Each end-user can manage their own connection using their personal cloud storage account.
- Global: Administrators can manage user connections using a shared cloud storage account.
T: Drive Path: The full file path where the storage provider will be mounted. Defaults to
T:\\{storage-type}.Supported Account Types: The account types that are allowed to login and access their files with this storage integration. Multitenant allows users from any tenant to login, while Single tenant restricts users to a single tenant.
Test: Storage provider configurations may be tested before committing any changes by clicking on the Test button. Common errors such as invalid or missing credentials or application registration misconfigurations will be reported during the testing process.
Storage Connections
The Storage Connections page allows administrators to view and manage global connections with a variety of third-party services as well as local network storage. These connections support configurable file and user access.
Users with access to these connections will see the files on their Portal dashboard as well as while launching applications with Turbo Drive.
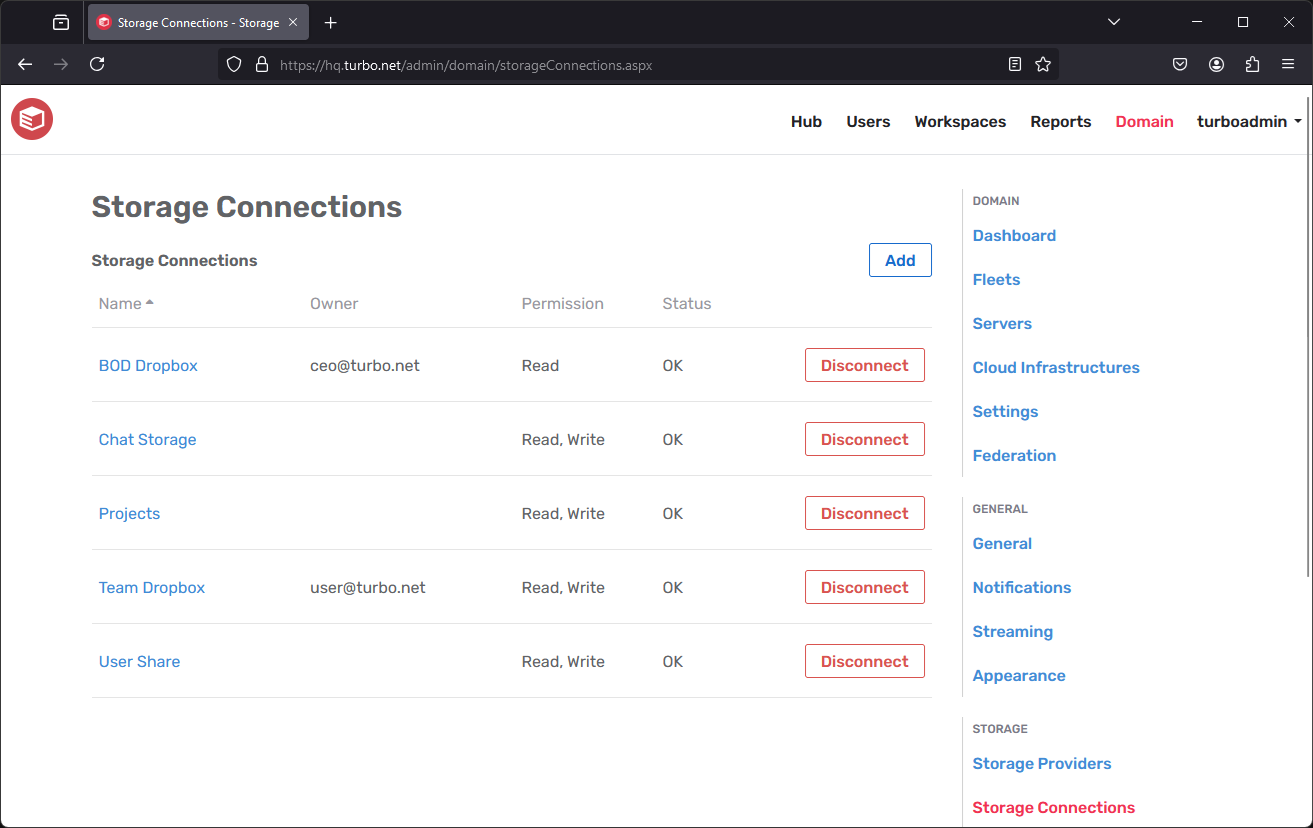
Add Storage Connection
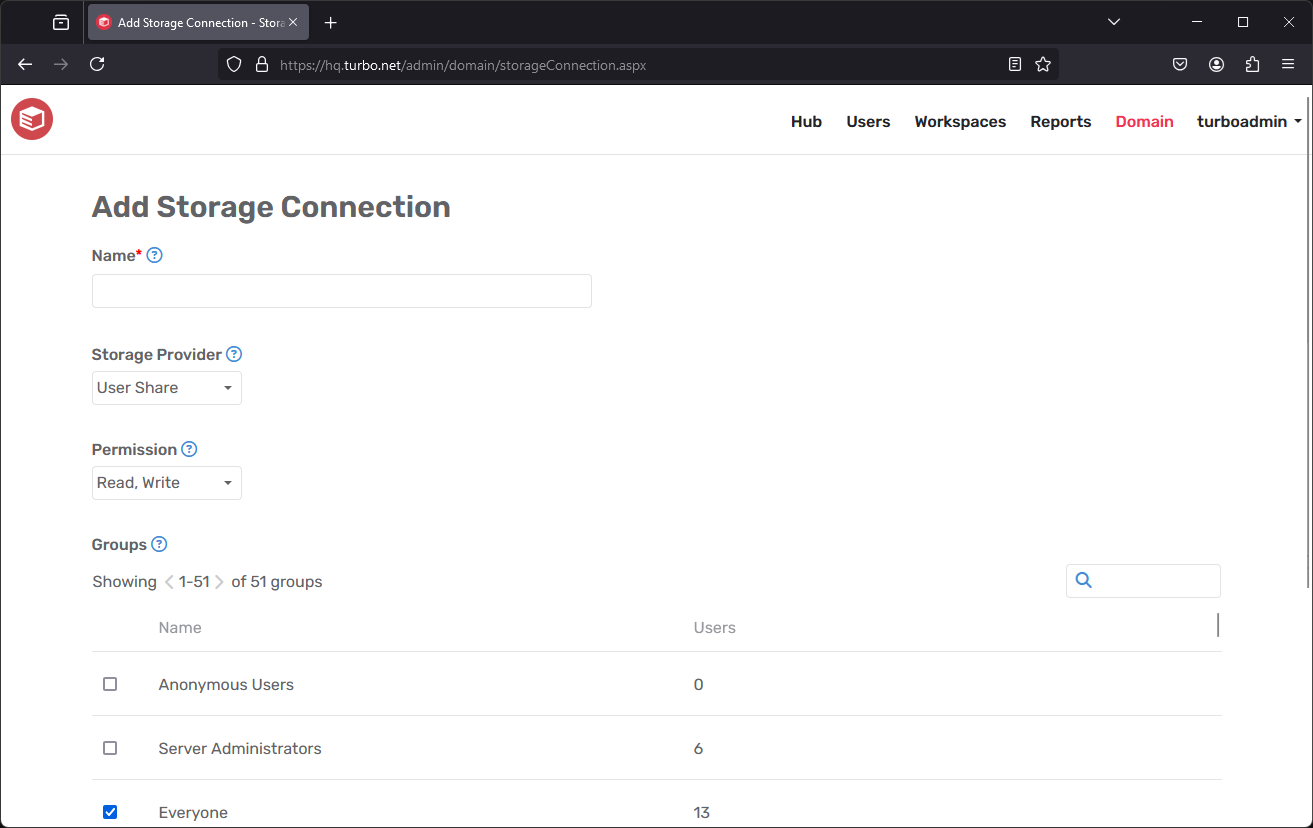
Click on the Add button to add a storage connection.
- Name: The display name of the storage connection.
- Storage Provider: The storage provider integration to which the connection will be created. Only storage providers set to "Global" connection mode will be listed.
- Permission: The file permissions granted to end users using this connection. Currently supports "Read-Only" and "Read, Write".
- Groups: The user groups that will have access to this connection.
OneDrive Support
When creating a OneDrive connection, it is important to note that OneDrive uses additive scopes. This means that any scopes you have previously consented to will be applied to all future connections. For example, creating a "Read, Write" connection and then a "Read-Only" connection will grant "Read, Write" access to both connections.
To ensure that your connection has the correct permissions, it is recommended to manually revoke any existing consents before establishing a new connection. To do this, please visit the Microsoft My Apps portal, locate your OneDrive application registration, and click on Manage your application > Revoke consent.
During the connection process, you will encounter a consent screen. Please carefully review the displayed scopes to ensure they align with your desired permissions before proceeding.
If you do not see the consent screen, it is possible that the scope has been implicitly granted by an administrator. To address this, follow the OneDrive setup guide and ensure that admin consent is not granted.
Dropbox Support
Creating a Dropbox connection with file permission scopes requires your Dropbox application registration to be a "Scoped Application". If you Dropbox application registration was created before Dropbox introduced scopes, then you may need to update your application following their migration guide.
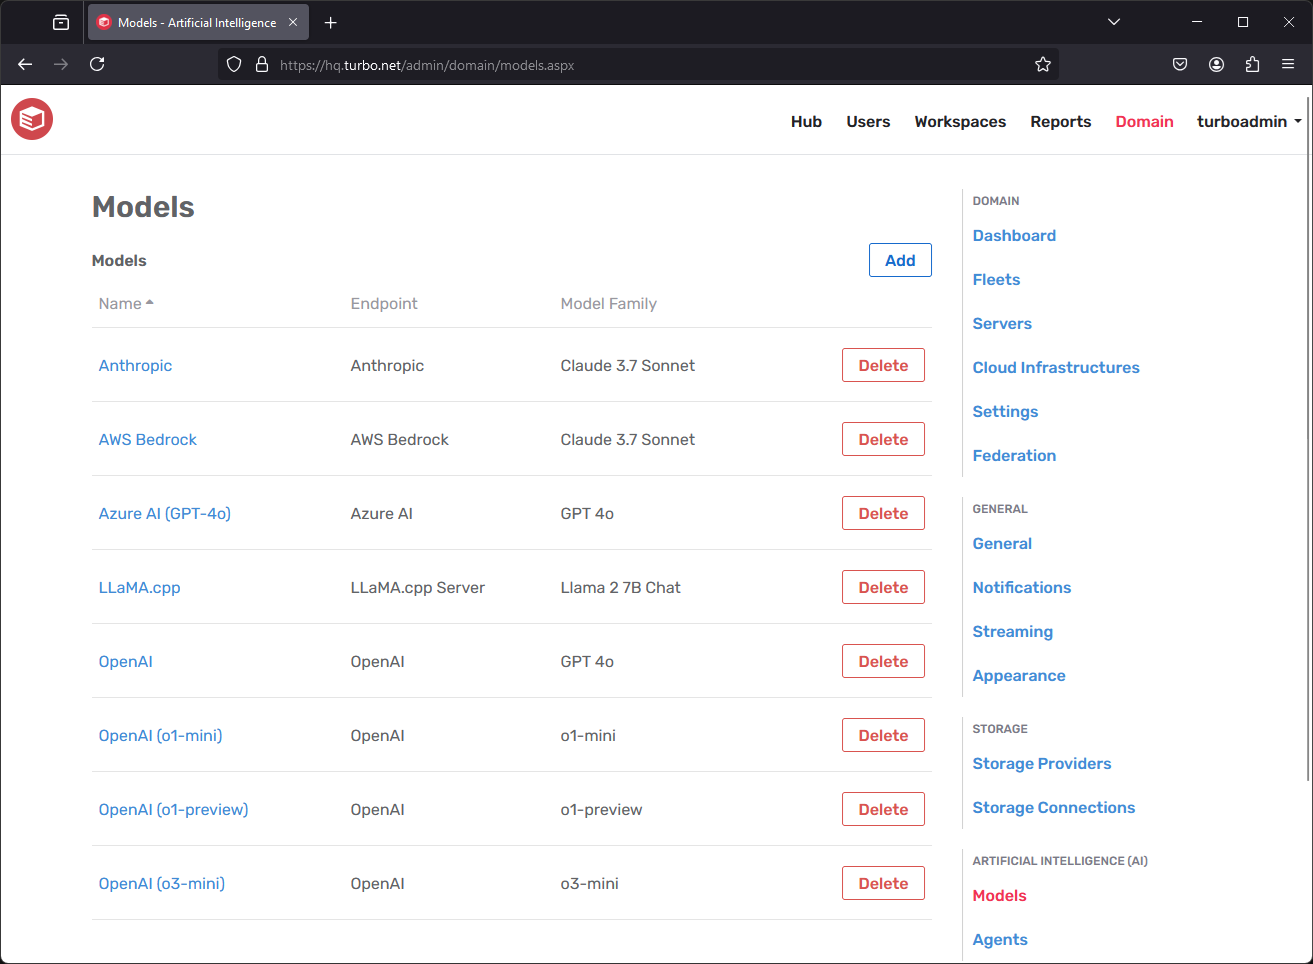
AI Models
The Artificial Intelligence section allows administrators to view and manage connections with various artificial intelligence services, such as OpenAI. The chatbot is hidden by default and must be enabled from the Dashboard Tabs appearance setting. Once configured, end-users may access the chatbot from the Chat tab on their Portal dashboard.
For more information, see our OpenAI integration documentation.
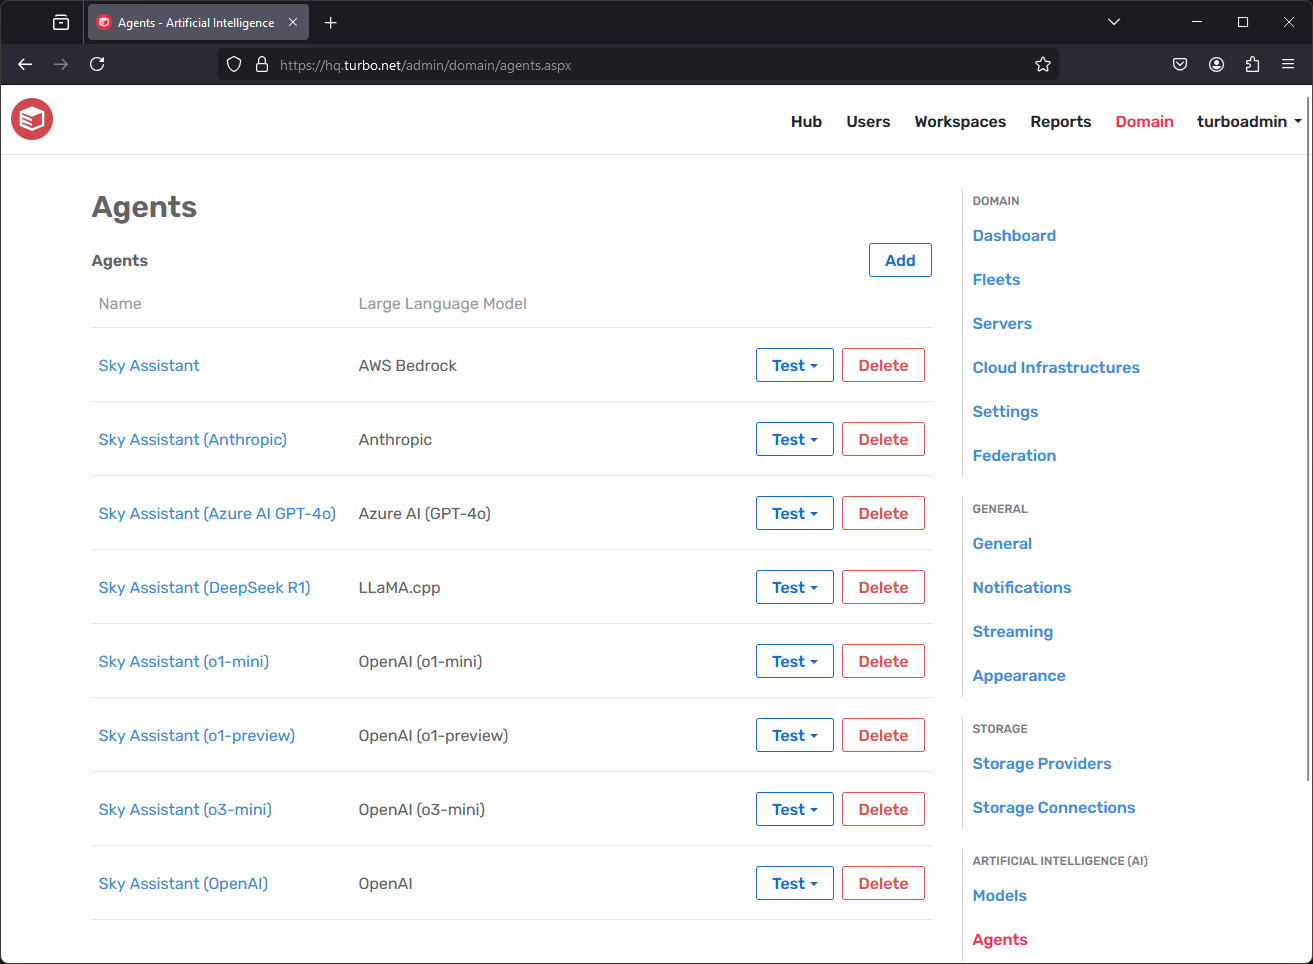
AI Agents
Learning Management Systems (LMS)
The Learning Management Systems (LMS) page allows administrators to view and manage connections with various LMSs such as Canvas, Moodle, and Blackboard.
Once configured, students may access the Turbo Portal and launch applications through their LMS.
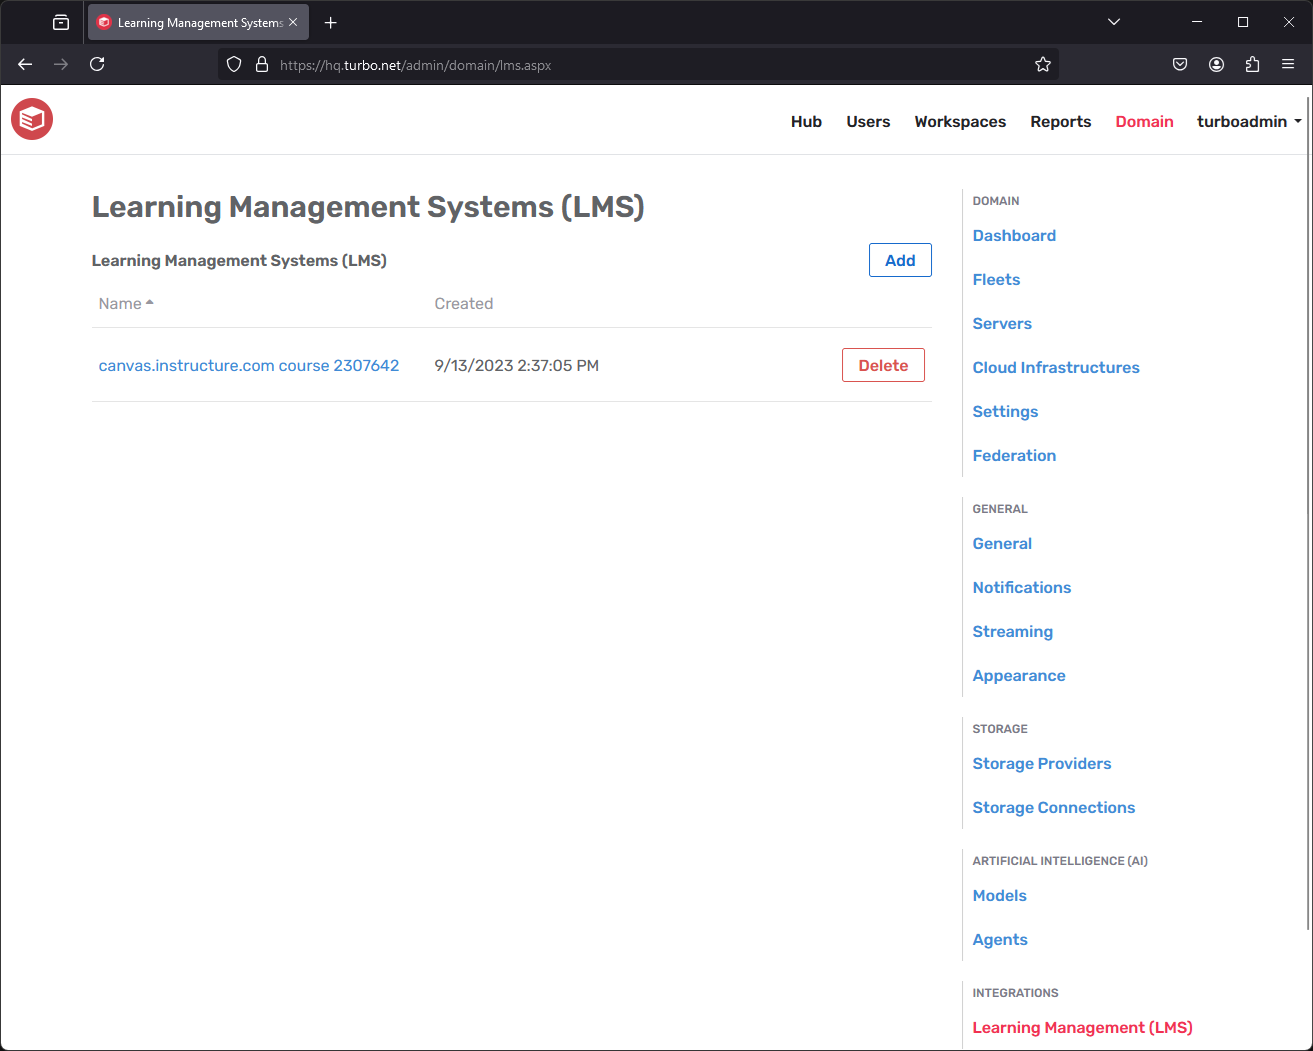
Instructions for setting up an LMS connection are available for Canvas, Moodle, and Blackboard.
The following sections describe the available LMS configurations:
Show in Course Navigation
When the LTI Configuration URL is used, Turbo Server sends user interface instructions to the LMS Platform. These UI instructions include a Turbo icon, description and the following fields:
- Placement location: Course Navigation
- Link text: Apps (customizable)
- Visibility: public
- Default: enabled (customizable)
When Show in Course Navigation is disabled, the Default setting changes to disabled. New courses then hide the apps link from students by default until an instructor chooses to enable it.
Show in Course Navigation and Link Text settings will not affect LMS Platforms using the LTI Tool Provider URL.
Turbo must be removed and then re-added to the LMS platform for changes to these settings to take effect.
User Identity
Upon receiving a LTI 1.0/1.1 Launch Request from the LMS platform, Turbo Server must determine the user identity requesting access. Turbo identifies users with two values, both of which must be unique and immutable:
- Login Name: User friendly identifier for signing in to Turbo resources.
- User ID: User's primary key in your organization's Learning Information System (LIS) or Directory Service.
By default, Turbo will look for these values in LTI Launch Request fields specific to each LMS Product. The following table describes the default fields used for identity for a given LMS.
| LMS | Login Name | User ID |
|---|---|---|
| Canvas | custom_canvas_user_login_id | user_id |
| Moodle | ext_user_username | user_id |
| Blackboard | list_person_sourcedid | user_id |
| Other | lis_person_contact_email_primary | user_id |
If your organization has modified the platforms’ identity settings, you may configure Turbo Server to find the Login Name and User ID under custom field names.
Navigate to the LTI page of the Turbo administrator site. Under the relevant value, check Custom to override the default field, then type in the name of the LTI Launch Request field for Turbo Server to use.
Workspace
Associating a workspace with the LMS integration allows configuration of where end users will be redirected to when launching Turbo from the LMS. Additionally, this determines the workspace to which channels will be added when Automatically Create Channels is enabled.
Selecting "None" will redirect users to the Turbo Portal homepage. If the user has access to exactly one workspace then that workspace will be displayed, otherwise a list of available workspaces will be displayed.
Automatically Create channels
Automatically creates a new channel in the specified workspace for unknown courses. A workspaces must be selected to enable this setting.
If the role of the user is an instructor, content developer, or administrator, grant the user administrative permissions to the channel when the channel is created. The instructor will be able to add users and applications to the channel from the portal.
Automatically Grant Permissions
Automatically grants user level permissions for the user to the target workspace.
Courses
Adding a Course to the Turbo Server allows configuration of a custom link to a particular Workspace or Channel. When a user launches Turbo from a known course, they are routed directly to the configured view.
To add a course to Turbo, it must first exist in the LMS. To edit an existing course, click on its name in the Courses table.
- Name: Administrative display name for the course, not seen by users.
- Course ID: Unique identifier for the course given by the LMS. Refer to the section below to obtain the value for the desired courses.
- Workspace: The Workspace users from the course will be routed to.
- Channel: The Channel view that users will be routed to. If left blank, users will be routed to the Workspace view.
- Default Channel Access: Automatically grant channel access to users from the LMS course. If the setting is not enabled, users must be granted permissions to the channel manually. Users must also have access to workspace regardless of this setting.
Renaming or deleting a course does not affect the LMS itself; these properties affect only how Turbo interacts with the course.
The following section describes how to locate the course ID for supported LMS.
CANVAS
Navigate to any page of the desired course in Canvas. The URL will take a form similar to:
https://canvas.instructure.com/courses/2307642/quizzes
The number immediately after /courses/ is the Course ID. In this example, that number is 2307642.
BLACKBOARD LEARN
Navigate to the Blackboard Administrator Panel. Under the section Courses, click on the Courses link.
Locate your course in the table. The Course ID is shown for the course.
MOODLE
Navigate to the settings page of the desired course.
The settings page can be reached by clicking the gear icon on the course’s home page or the gear icon on the listing in Course and category management.

The Course ID is located under General. If the course does not yet have an ID, one must be given.