Appearance
Users
Turbo Server users and user groups can be viewed and managed from the Users page on the Administration Site.
Users and user groups can be created manually in the Internal directory, imported from LDAP/Active Directory directory services, or generated via Single Sign-On Authentication Providers.
From this page, server administrators can also view and configure the current license usage and total licenses, Directory Services, Authentication Providers, Authentication Method, Device Keys, and API Keys.
Users and Groups
Creating Users
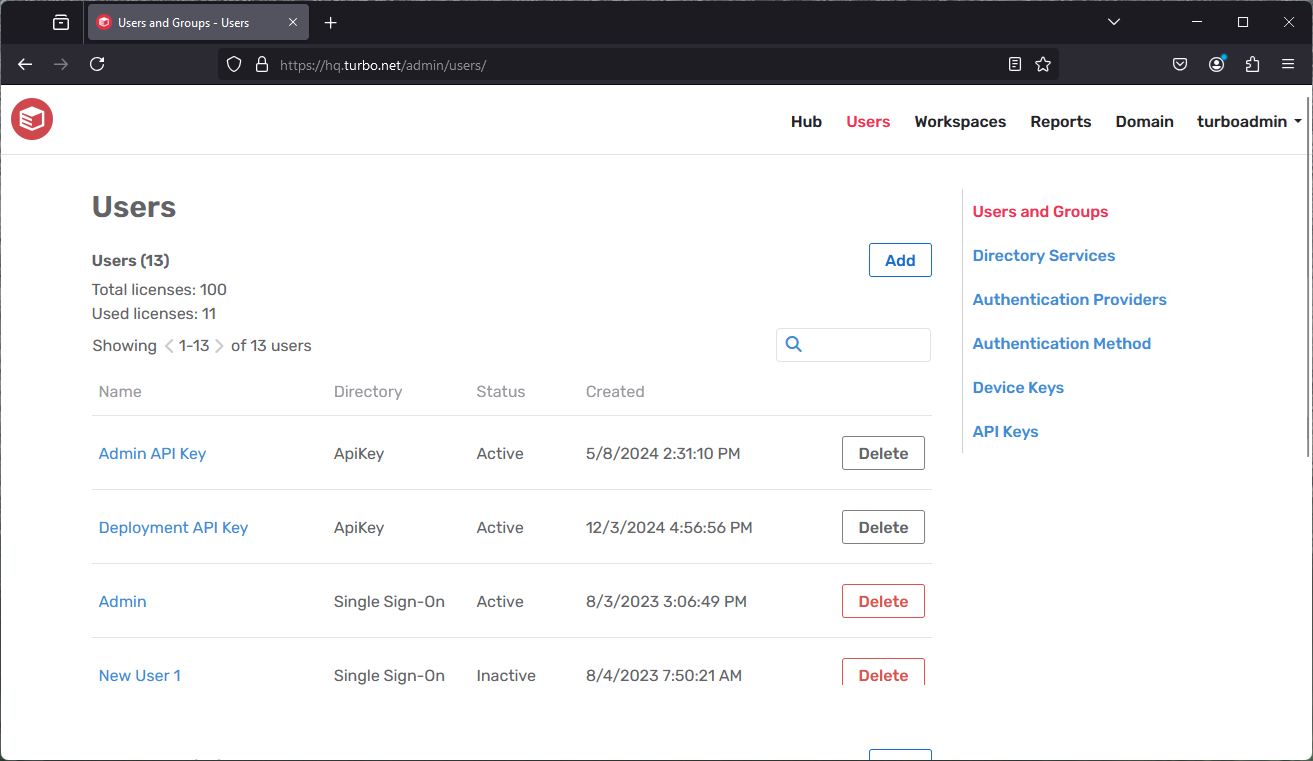
To manually create a user in the Internal directory, click on the Add button in the Users section from the Users page, then specify the Name, Login Name, Password, and Status for the user.
For each API Key, an implicit users is created in the ApiKey directory. To remove the user, the associated API Key must be deleted.
Users can also be automatically generated via Directory Services or Single Sign-On. Users generated via Directory Services will update on the next Directory Service synchronization. Users generated via Single Sign-On will update on user SSO login.
Managing Users
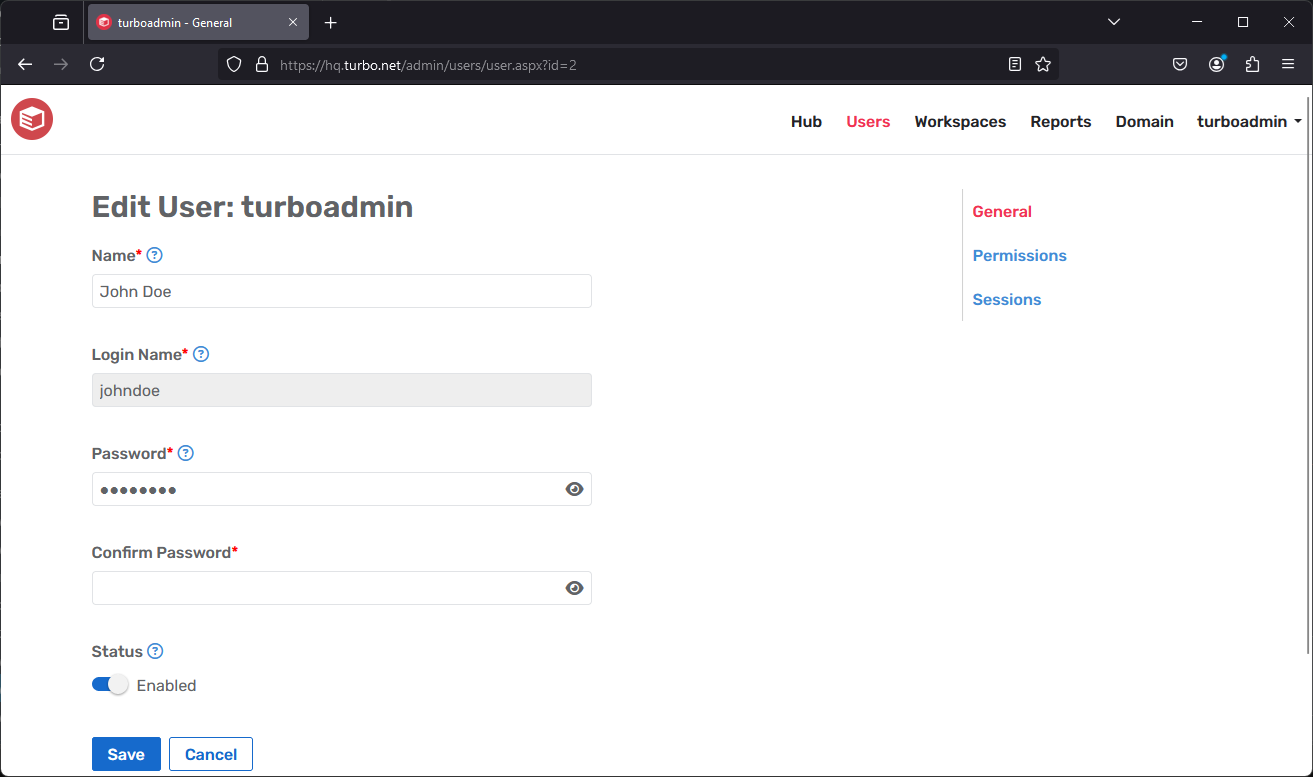
To manage a user, click on the user name from the Users list on the Users page. The following fields are displayed on the page:
Name: Full name of the user.
Login Name: The unique login name for the user.
Enabled: Determines whether a user can access Turbo Server.
When a user is disabled, they no longer consume a license seat and cannot log in Turbo Server.
User Permissions
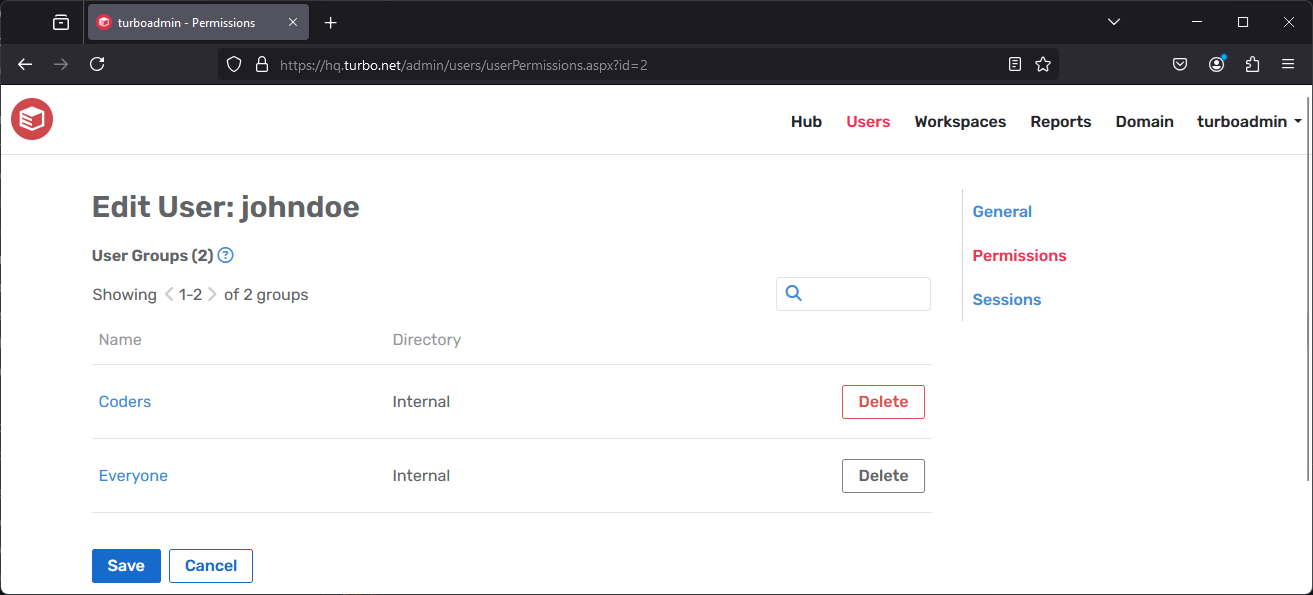
The Permissions tab lists all user groups to which the user belongs. User groups determine which workspaces a user can access.
For more user group management options, please see Managing a User Group.
User Sessions
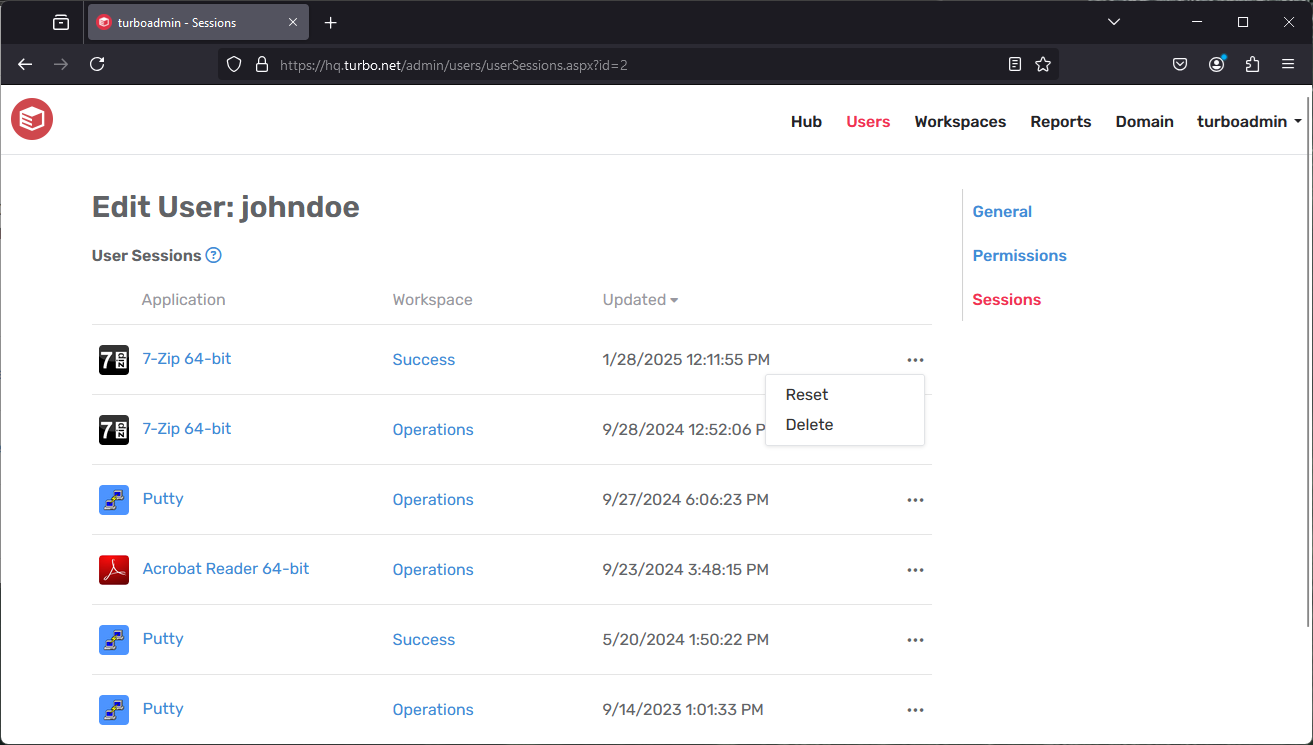
The Sessions tab lists all synchronized sessions for the user. Session synchronization is enabled by the Synchronize across devices workspace application setting, which automatically synchronize the user state and settings with Turbo Hub.
Reset: Resetting a user session will delete all of the synchronized state and settings from Turbo Server. Sessions that are cached on the user's local device will be reset the next time they run with session synchronization enabled.
Delete: Deleting a user session will delete all of the synchronized state and settings from Turbo Server. Sessions that are cached on the user's local device will not be deleted. To prevent the locally cached session from synchronizing to the server you may disable session synchronization in the workspace application settings.
Creating User Groups
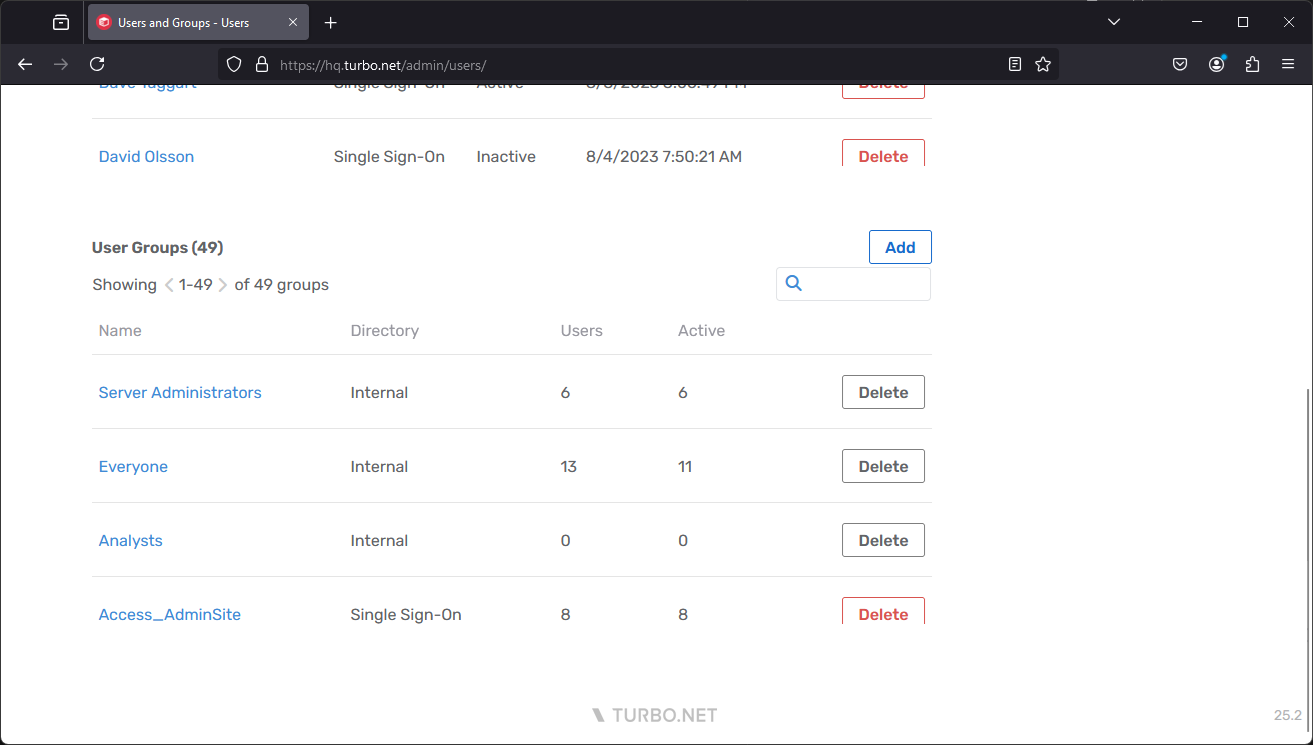
To manually create a user group in the Internal directory, click on the Add button in the User Groups section from the Users page, then specify the Name, Description, and Add Members to the group.
Users groups can also be automatically generated via Directory Services or Single Sign-On. User group membership for groups generated via Directory Services will update on the next Directory Service synchronization. User group membership for groups generated via Single Sign-On will update on user SSO login.
Managing User Groups
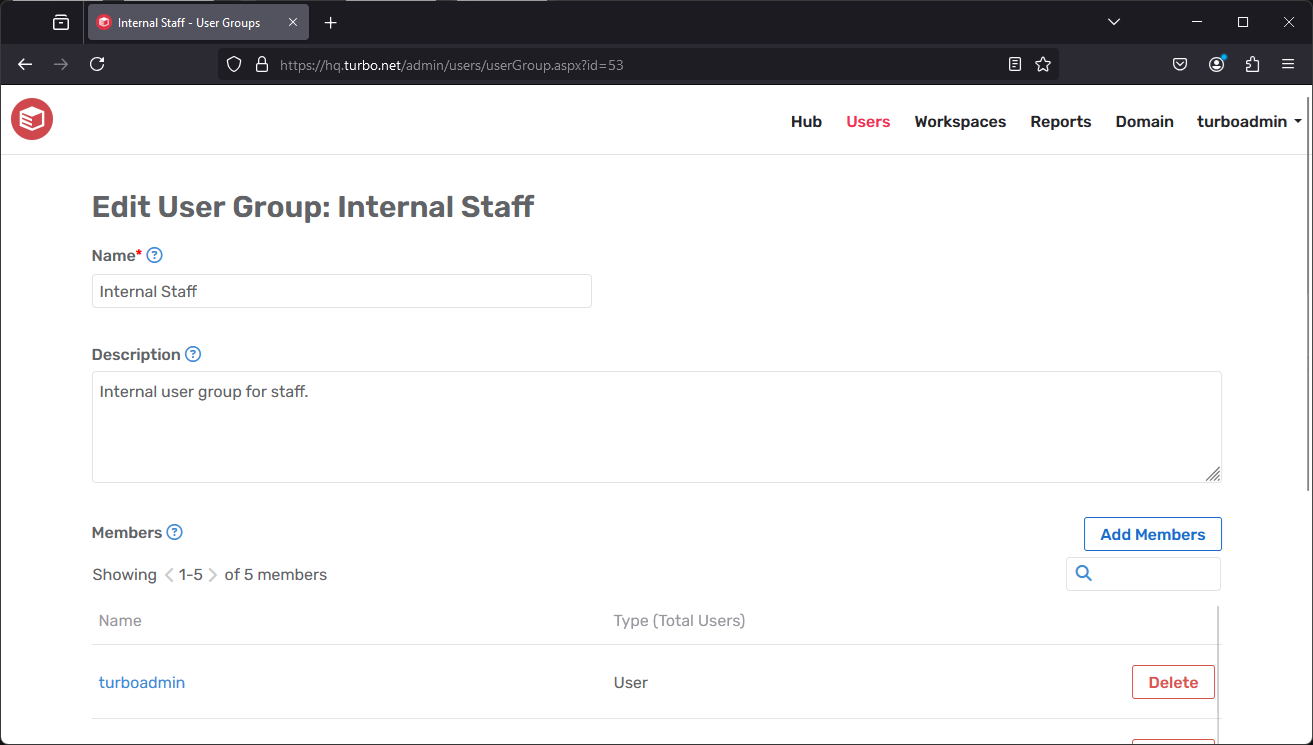
To manage a user group click on the user group name from the User Groups list on the Users page. The following fields are displayed on the page:
Name: The group name that displayed on the user screen.
Description: A group description (optional).
Members: Users and groups that are members of this group. Users and groups are inherited when including other groups as members. Add users or other groups by selecting Add Members.
The following groups are special groups in the Internal directory that are created automatically and cannot be deleted:
Server Administrators: This group will be able to log into the administration site and push shared images. Note that changes to the Server Administrators group will require a service restart before they are honored by the hub services. Access to the administration site will be honored immediately.
Analysts: Users in the Analysts group will have access to the administration reports. No other administrative permissions are granted beyond access to reports.
Anonymous: This group automatically includes any user created via the Anonymous authentication mode.
Everyone: This group automatically includes all users regardless of authentication mode.
Directory Services
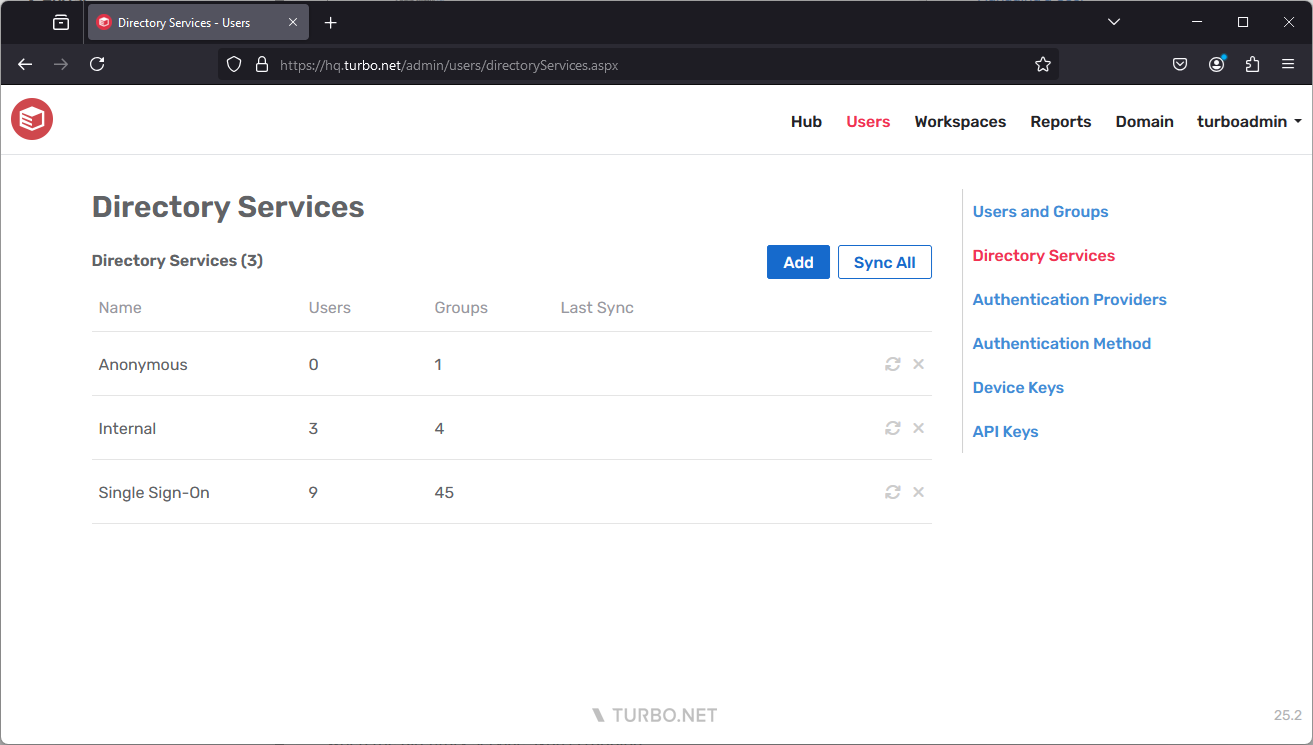
The Directory Services feature enables server administrators to easily import their users from their existing user directory into Turbo Server.
Active Directory and LDAP services are managed at Directory Services on the Users page.
Adding an External Directory Service
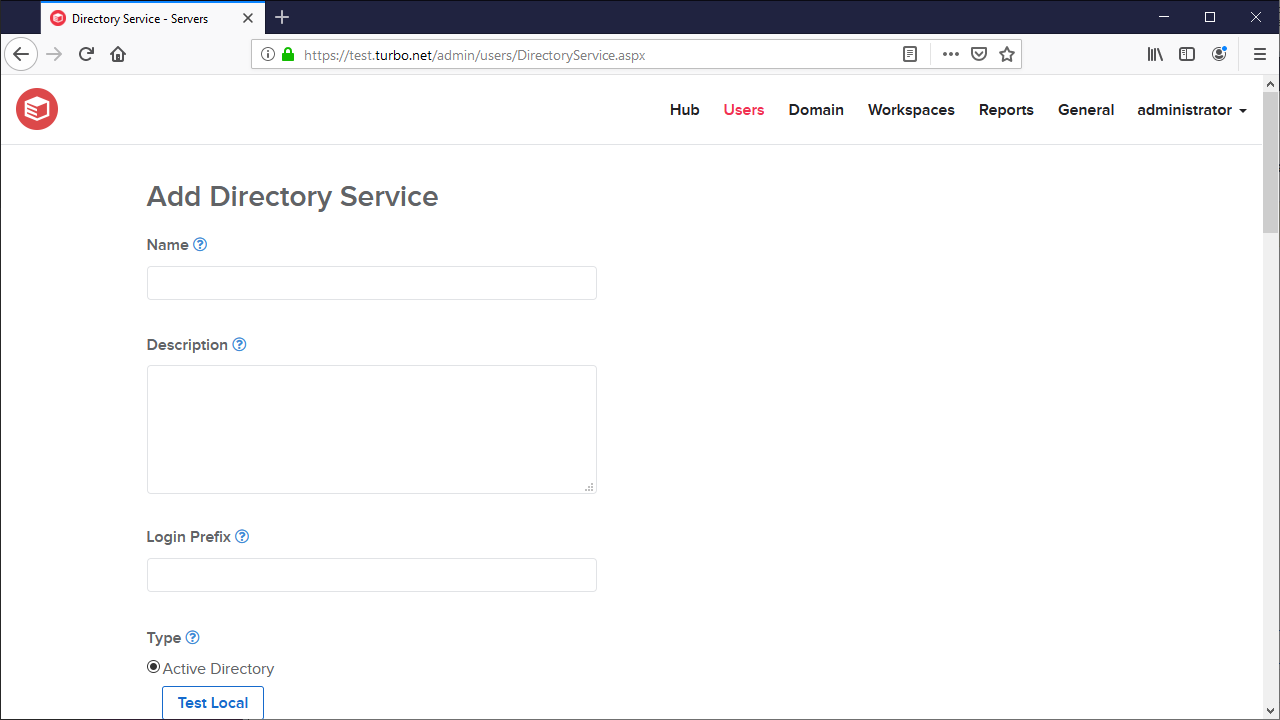
To add an external directory service, such as Active Directory or LDAP, click on the Add button on the Users > Directory Services page. The Add Directory Service screen will display with the configuration options, which are detailed below.
NOTE: When identity federation is enabled from a source domain to target domain, avoid manual synchronization of directory services in the target domain. Doing so can lead to identity discrepancies, potentially preventing users from receiving updates from the source domain.
Note: When synchronizing external directory-services containing of over 5,000 users, the command-line administration utility should be used instead of the Administrator web site. For more information on using the administration utility, see Manage Turbo Server from the Command Line. Synchronizing large directory services uses up to 1 GB memory per 500,000 users and groups on the hub server. Ensure that your hub server has enough memory to handle ordinary load when the directory service sync is running.
Directory Service Settings
| Section | Description |
|---|---|
| Name | This field indicates which service is being added or controlled by the entry. The Name field must not be the same as the service or server you are using. |
| Description | (Optional) Administrators can include a description of the directory service being added, which can be helpful in recording notes about the service. |
| Login Prefix | Login prefixes are given to each user in the directory service to use when they log into the server and are helpful in distinguishing users across different directories. For example, if the directory's login prefix is "acme" and the user's name is "aaron", they would log on using the full name "acme\aaron." Once this login prefix is chosen for a directory, it cannot be changed. If you must change the login prefix, the directory service can be deleted and a new one added for the same directory; settings for all users from that directory are lost. |
| Type | In the Type section, you can choose the type of the directory service from which to import users and groups. There is variability in location, security, and schema settings for directory services. Turbo Server provides two templates: Active Directory and Other LDAP. The local Active Directory can be found by selecting Try Local. When found, working connection settings are set automatically. To synchronize with the local Microsoft Windows domain's Active Directory service, select Try Local. This loads default settings into the Connection and Directory Schema fields. For large directories, this can take several minutes. If the operation is unsuccessful, continue to the Choosing Your Connection Settings section. If the operation is successful, continue to the Choosing the Directories to Synchronize section. |
| Server | This section can be used to specify your connection settings to the LDAP directory you are trying to connect to. For more on this section, scroll down on this page to Choosing Your Connection Settings. |
| Binding Type | This field is used to specify the form of security being employed by the LDAP server you are connecting to. If "Default" is chosen for Port in the Server section, changing the Binding Type will automatically change the port to the standard LDAP port number for that setting. |
| Synchronization Account | This field specifies the account to use when synchronizing users with the directory services. For more information, scroll down on this page to Choosing Your Connection Settings. |
| Directory Schema | Allows the administrator to specify which names in the LDAP directory will be imported into the Turbo Server user information. For more information, see Directory Schema, further down this page. |
| Page Size | The page size used when synchronizing the directory service. Typically, the default value for Active Directory services is 1000. Some LDAP implementations do not support the PageSize property, and should be set to 0. |
| Synchronized Items | Used to identify items in the directory tree that should be synchronized with Turbo Hub Server. For more information, see Choosing Items to Synchronize, further down this page. |
Choosing Your Connection Settings
Complete the following steps to choose your connection settings:
Enter the settings for the Server section. The Host, Port, and Top directory are initialized with typical values, but you can customize them to match your directory service settings. They are best discovered using the management tools for the application that hosts them, such as Microsoft Windows or Apache Directory Services.
- The Top directory should be specified to avoid potential login issues that are difficult to troubleshoot.
Set the Binding Type. Changing the Binding Type will change the Port to the standard LDAP port number for that setting, if you have not specified another port number.
- Choosing the Simple binding type is not recommended if you are binding to Active Directory, but it can be useful while on the page in diagnosing connection problems via the Test button.
Enter your credentials at the Synchronization Account section. To connect with a specific account in the Synchronization Account section, specify the username:
Active Directory: The domain login (e.g. acme\aaron)
Generic LDAP: The distinguished name (e.g. uid=aaron,ou=acme,ou=system)
To test these settings, click on the Test button.
Once the test is successful, proceed to the Directory Schema section.
Directory Schema
Directory schema settings are customizable within any directory service; you can change these settings to match the names in your directory service. The most common schema values are tried by selecting Discover. You can select Discover when you are not satisfied with the result in the Synchronized Directories section. Complete the following steps to use the Discover functionality:
Select Refresh from the Synchronized Directories section and inspect the results. If the users and groups shown there are accurate, leave the directory schema settings as they are.
If the Synchronized Directories does not accurately depict the users and groups you expect, select Discover and wait for the schema settings text boxes to fill with the recommended values. Test these values at any time from using Refresh in the Synchronized Directories section.
If you know the correct schema name for the given properties, you can enter it manually. If there are more than one name for the same value you can enter each name separated by a semicolon. Each is searched during synchronization.
To reset the settings to the Turbo Server default, select Defaults.
Choosing Items to Synchronize
You may limit the scope of users and groups that will be synchronized from your directory service, either by choosing specific directories within the service, or by selecting the user groups in which you are interested.
Choosing directories
Your directory service might contain some subdirectories that have useful information and others that contain unwanted information. You can choose which subdirectories to synchronize using Synchronized Items, selecting the Directories option. Complete the following steps to use Synchronized Items:
Select Refresh to use the current connection and directory schema settings to scan your directory service. Information about discovered sub-directories is available via tooltip popups. For large directories this operation can take several seconds to complete.
To narrow the scope of your synchronization to specific directories complete the following:
a. Uncheck Include All. b. Filter results using the search text box (group name prefix). c. Check directories to include.
Choosing groups
You may have a specific subset of existing users that will use Turbo Server, in a group or groups native to your directory service. You can choose which groups to synchronize using Synchronized Items, selecting the Groups option. Complete the following steps to use Synchronized Items:
Select Refresh to use the current connection and directory schema settings to scan your directory service. Information about discovered group is available via tooltip popups. For large directories this operation can take several seconds to complete.
To narrow the scope of your synchronization to specific groups complete the following:
a. Uncheck Include All. b. Filter results using the search text box (group name prefix). c. Check groups to include. All members of that group will be synchronized, including contained groups and all of their members.
When you are satisfied with your settings, select Save. At this point, the users and groups in your directory service are not synchronized with Turbo Server. From the Manage Directory Services page, click the synchronization button and verify there are positive counts for users and/or groups when it has finished. For large directories this can take several minutes.
Users created by directory service synchronization are set to disabled by default. These users may still login via the Turbo client using integrated authentication and run commands such as launching applications. The user will be automatically set to enabled once they run an application online. Running an application offline will not set the user to enabled.
NOTE: External users synchronized from active directory should not use the login prefix when logging in. User names must be unique, so if there are two users from different active directory sources, only the first one will be synchronized. Password verification is passed through to the active directory service and are not stored on Turbo Server.
Troubleshooting Directory Services
Domain identity federation did not update a user's groups
This issue can occur when a user that was previously created by domain identity federation is then synchronized through other means, such as manual directory synchronization in the target domain. In such cases, domain identity federation may bypass updates for the affected user, indicated by a specific log entry in the target domain's service logs:
03/25/2024 19:41:08.4550 - Info - 0x158C: User with login <username> exists with guid <guid>, skipping replicationTo resolve this, delete the user from the target domain. Then, allow domain identity federation to re-synchronize the user from the source domain, ensuring proper update and synchronization of user group memberships.
Authentication Providers
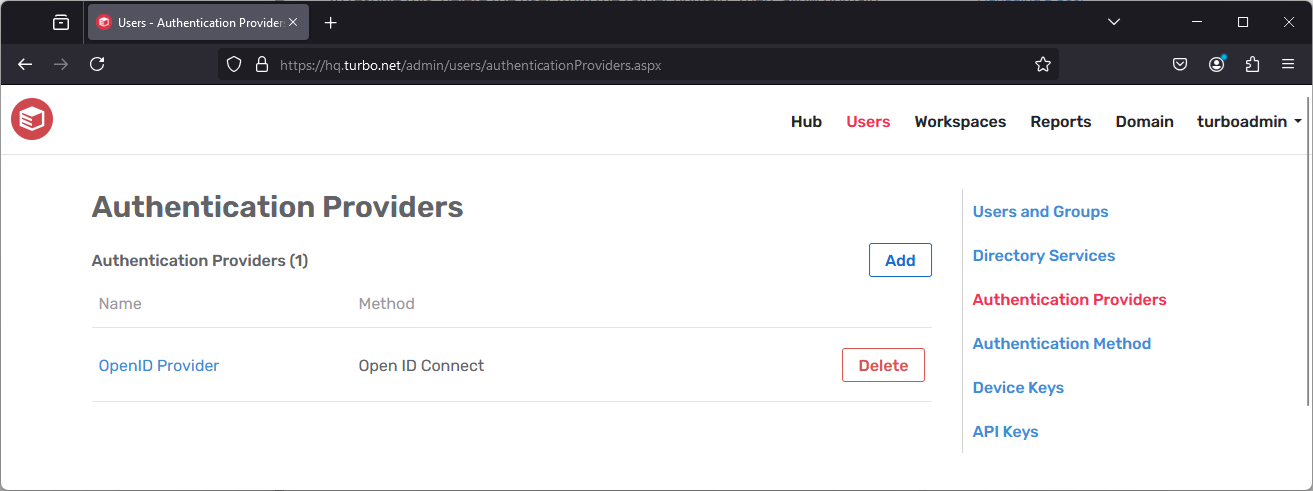
Server administrators can manage Single Sign-On authentication integrations at the Users > Authentication Providers page.
To add a new Single Sign-On integration, click on the Add button on this page.
To manage an existing Single Sign-On integration, click on its name under the Authentication Providers list.
Single Sign-On configuration may vary by provider. See common OpenID and SAML examples in the Authentication section.
Authentication Method
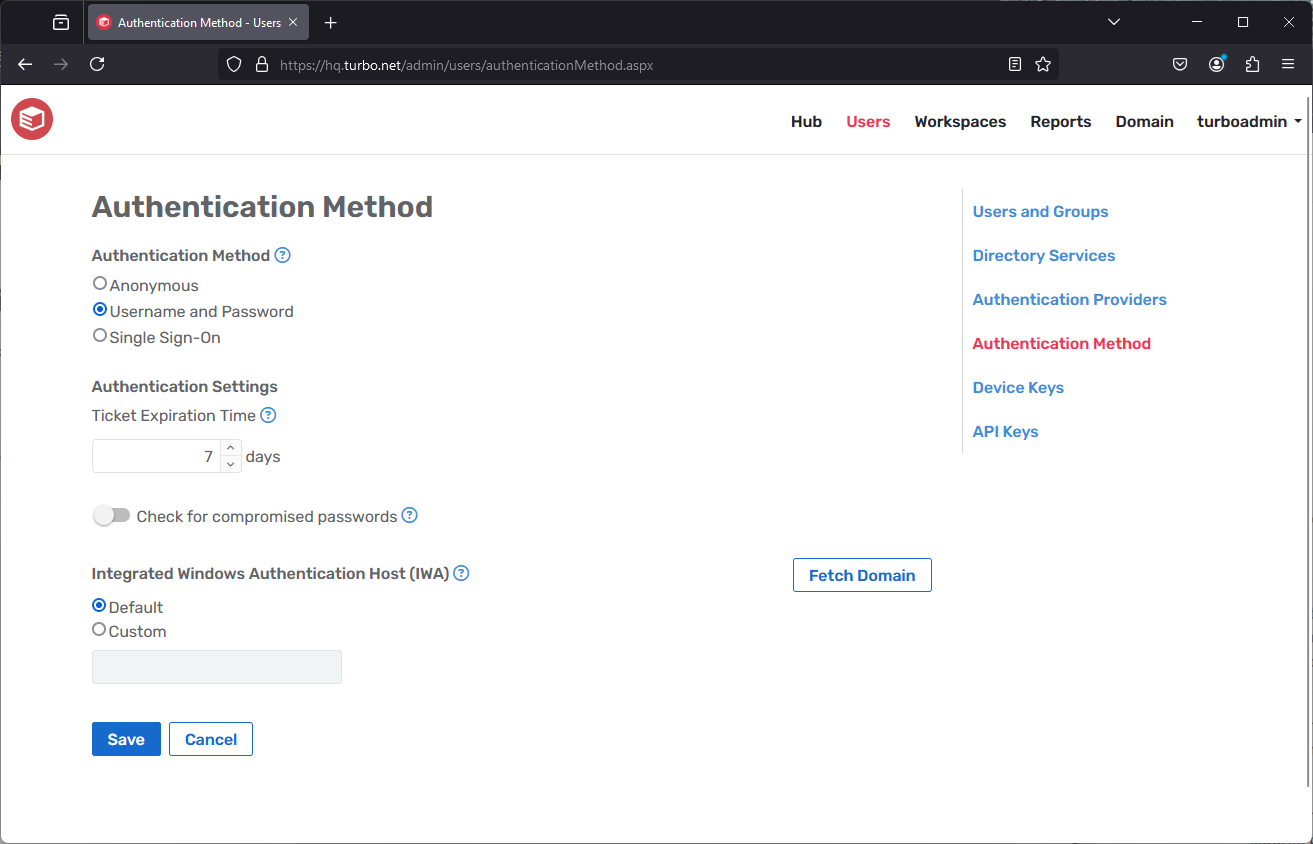
The Authentication Method page configures which Authentication Method is used when an end user logs into the Turbo Portal and Turbo Client. The supported methods are:
Anonymous: Anonymous authentication allows users to access the Portal without logging in. All anonymous users are added to the Anonymous Users group.
Username and Password: Username and Password authentication requires users to provide their username and password in order to log in. This method is used when authenticating with users in the Internal directory or external directory service.
Single Sign-On: Single Sign-On authentication allows users to login using a Single Sign-On provider, such as Azure AD or ADFS. Turbo Server currently supports the following Single Sign-On Methods:
OpenID Connect: This option will redirect users an identity provider login page that supports OpenID Connect authentication. Upon a successful login, the user will be redirected back to Turbo Server and an account will be created using the basic profile information provided by the OpenID claims. Some example identity providers that support OpenID Connect include AzureAD and Google. For more information, refer to OpenID Connect.
SAML 2.0: This option will redirect users an identity provider login page that supports SAML 2.0 authentication. Upon a successful login, the user will be redirected back to Turbo Server and an account will be created using the basic profile information provided by the SAML response claims. Some example identity providers that support SAML 2.0 include AzureAD and ADFS. For more information, refer to SAML 2.0.
Ticket Expiration Time: The amount of time that a login ticket is valid. By default the login ticket when logging in from the Portal will be kept for 7 days if the remember me checkbox is enabled.
Check for compromised passwords: Checks the haveibeenpwnd database for compromised passwords when setting the password for users in the Internal directory. This setting is only available when using Username and password authentication.
Authentication Provider: Select the default Authentication Provider. This setting is only available when using Single Sign-on authentication.
Integrated Windows Authentication Host: The IP or hostname of the domain controller for clients using IWA. Select Default to automatically detect the domain controller's IP address.
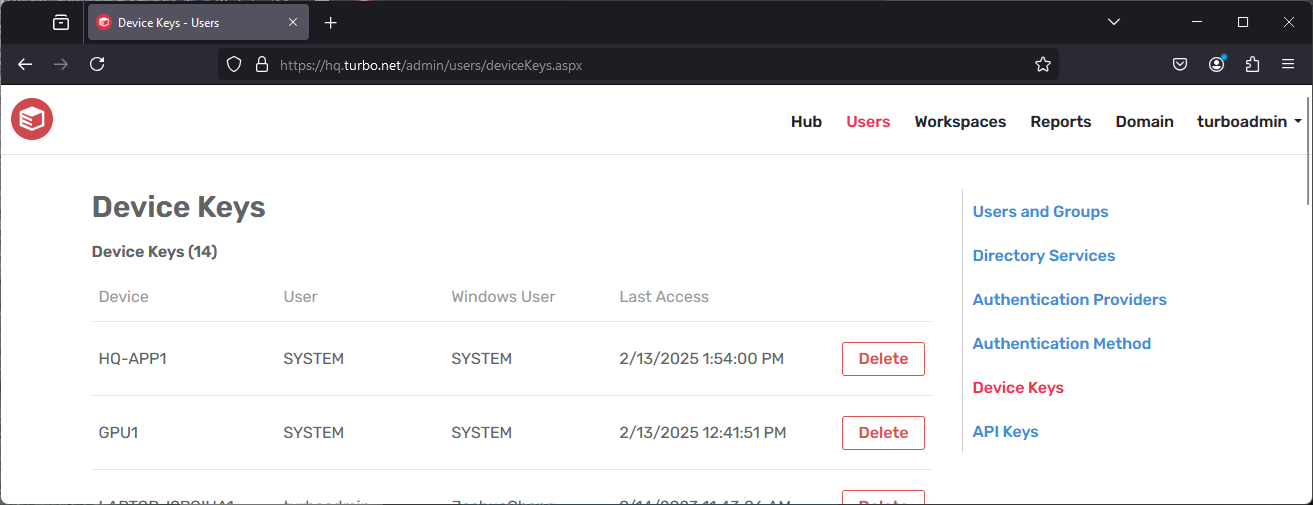
Device Keys
The Device Keys page lists all devices that are registered to the Hub Server. Devices are automatically registered with the Turbo Hub when subscribing or installing applications. Device Keys may be deleted in order to immediately revoke that device's access to the Hub Server.
API Keys
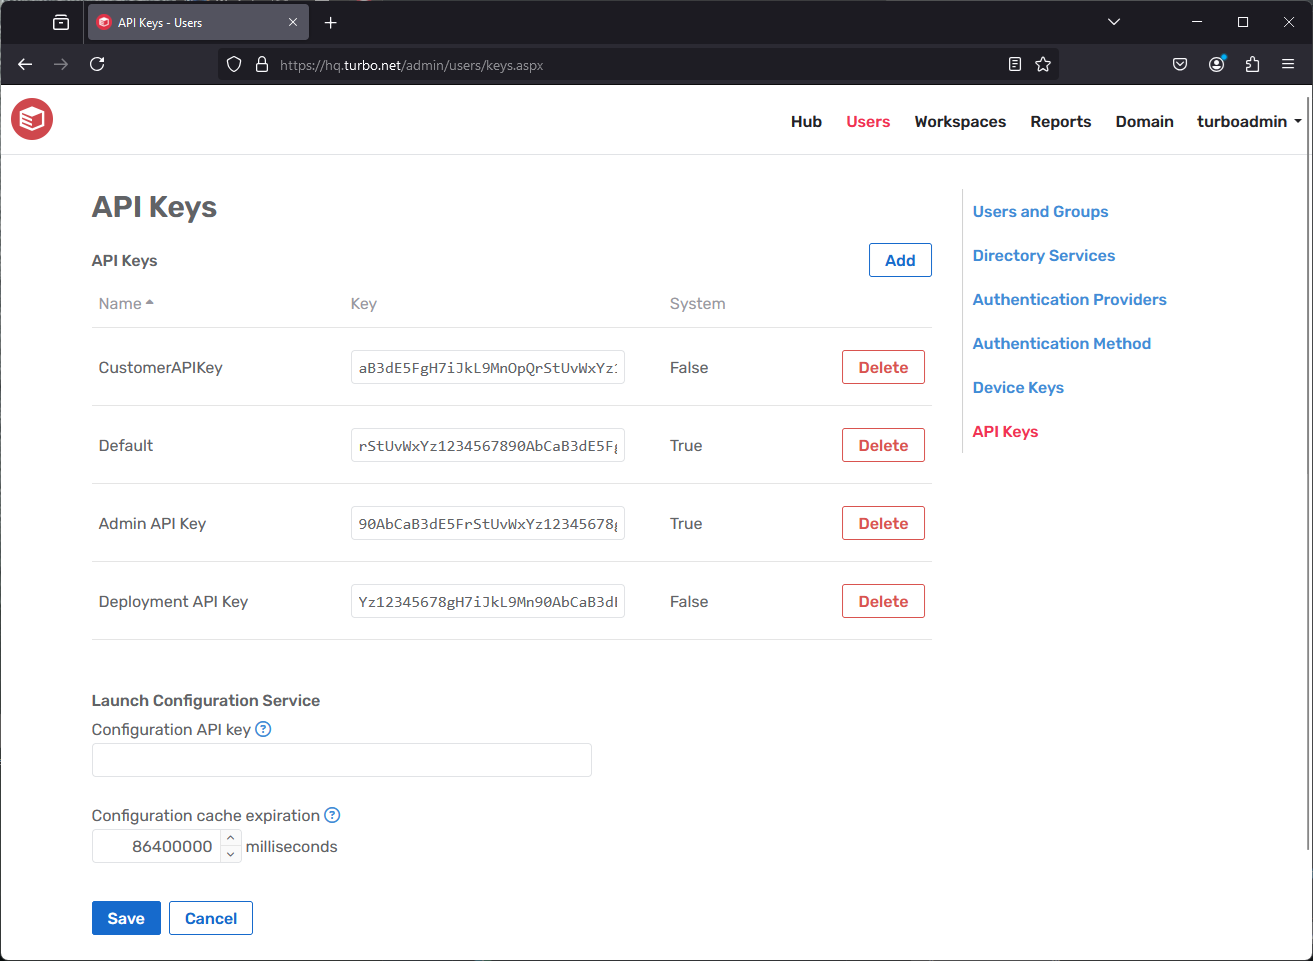
The API Keys page is used to manage the keys used to access Turbo Server.
API Keys allow you to log in to your Turbo Portal with a code other than with a username and password. This is useful when configuring automation or deployments where authentication via plain-text password or Single Sign-on is not desirable.
If an API Key has been compromised, it can be deleted to immediately revoke access.Configuration API Key is used by the Launch Configuration Service to post custom application configurations. Configurations posted with this API key are publicly accessible. This setting is recommended if you will be using an external portal instead of the Turbo Portal.
The Configuration Cache Expiration setting configures the length of time (in milliseconds) that a custom application configuration is valid after it is added to the launch configuration service. This timeout is reset any time the application configuration is accessed, such as during an application launch.
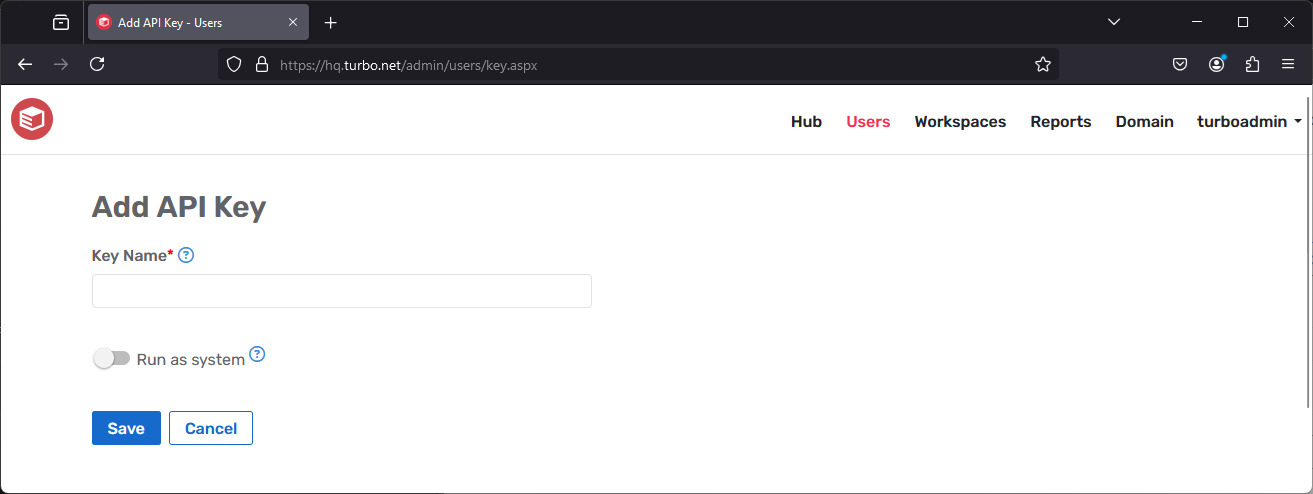
To create a new API Key, click on the Add button from the Users > API Keys page. For each API Key, an implicit user is created in the ApiKey directory, which allows the user to be assigned to a User Group as well as given user permissions to workspaces. Deleting the API Key will delete the implicit user.
Key Name: the name of the API key.
It is recommended that the key name describes the general usage of the key and that distinct keys are used for distinct usages, so that not all usages will require an update if one key is compromised and needs to be refreshed.Run as System: controls whether the key is given administrative privileges to push new images, delete repositories, and see all workspaces on the Turbo Portal.
Without this setting, the API key will only have read access to repositories and see only workspacess that it has explicit permissions for.